Custom Fields

Froonze
Last Update 2 jaar geleden
Introduction
One of the main purposes of creating customer forms is collecting additional customer information that can be used later to address or segment your audience, resulting in a valuable marketing asset that you can use to analyze your audience or to plan and run marketing campaigns. Therefore, once the forms are filled and submitted, the information must be properly stored and be ready to be accessed and used at any time.
In the case of our Custom Forms plugin we have chosen to store all of this information directly in Shopify, since it is the platform itself that has already the correct infrastructure and tools to store and filter this customer data.
If you take a quick look at the field categories that can be used to build our forms, you'll see that they are divided into standard, address, design and custom fields.
The first two categories, Standard and Address fields, have their own properties in Shopify's customer object, as well as an already defined input format, so they are captured directly by the platform as customer data in sections that can be consulted and exported at any time. The Design fields instead do not require storage as they concern only the design of the form and do not require any input of data from the customer.
However, the Custom Fields need to be created and assigned to a Shopify customer metafield definition before they can be used in our forms and therefore stored in the platform. Metafields are basically additional storage units that Shopify makes available to collect specific data. You'll need to create the new custom field, along with the metafield definition, directly in our settings, and once created you can then add them to the forms with the certainty that the data will be stored in Shopify, never duplicated and accessible for any future use.
Creating and adding Custom Fields usually implies a set-up in 2 steps, you'll create both the fields and the metafields in the first step, and then add and configure the fields in the form in the second step.
1. Creating Custom Fields along their customer metafield definitions
Go to our Custom Form > Custom Fields panel, and click on the button on the top corner to Add New Custom Field
You're introduced to a modal to configure 3 options:
- The label is a short description of the field that will be used as well as the name of the metafield definition we are going to create
- The key is a part of the unique ID used by Shopify to identify the metafield definition. Together, our namespace (froonze_custom) and this key will create a unique identifier for your metafield. For example, a metafield definition for customer favorite meal might have the namespace and key of froonze_custom.favorite_meal. The default key will replicate the label, if you want you can modify it further by clicking on Enter key manually and writing down the new key, but you can only modify this while you are creating the new field
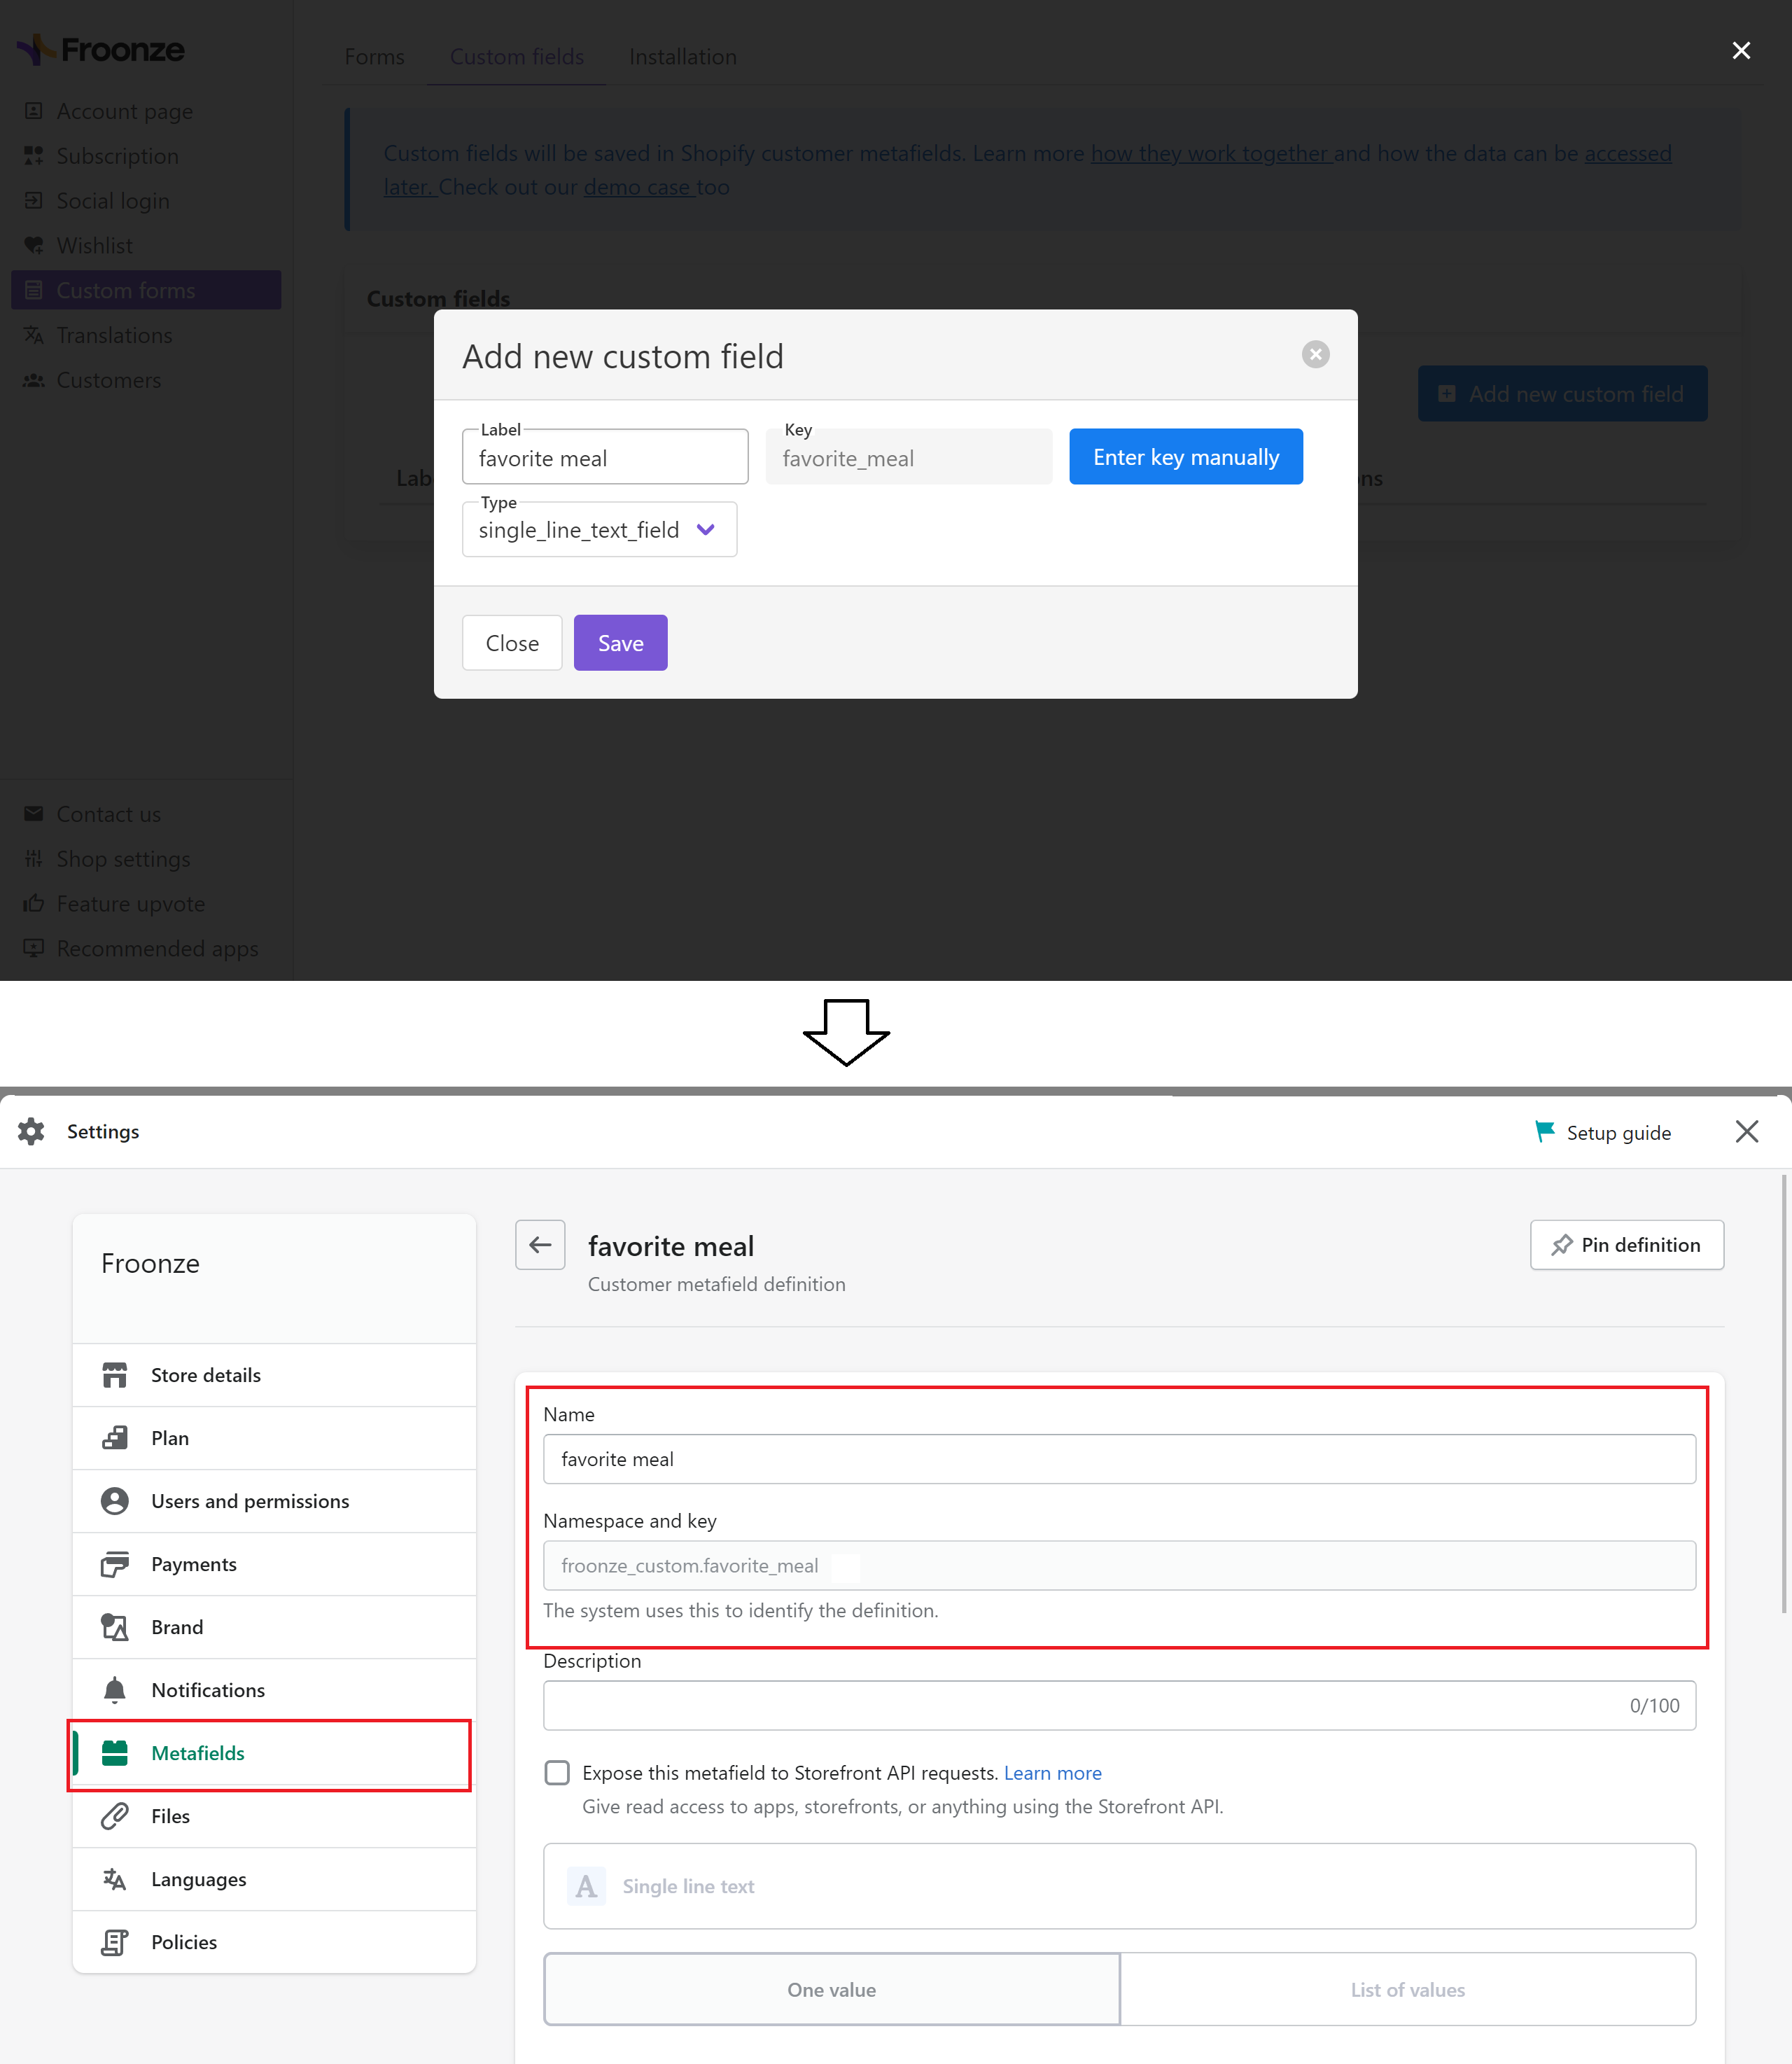
- The type will be used to select the type of content that the field and its metafield are going to capture

Label and key are pretty straightforward to set up but regarding the type it's important to understand that it is also determining the format of the data that the metafield definition will be able to collect. You must select a single_line_text_field type to collect text values (in a single line), multi_line_text_field to collect text values in multiple lines, number_integer or number_decimal to collect integer or decimal number values, date to collect date values, boolean to collect a true or false value, file upload to upload files, and multi_choice to collect multiple results of either single texts, integer or decimal number values. Most of these data types have also a strict relation with the input types they can be used along with, and a few of them admit different options as we'll see in the next point.
2. Adding Custom Fields to the form and choosing the input types
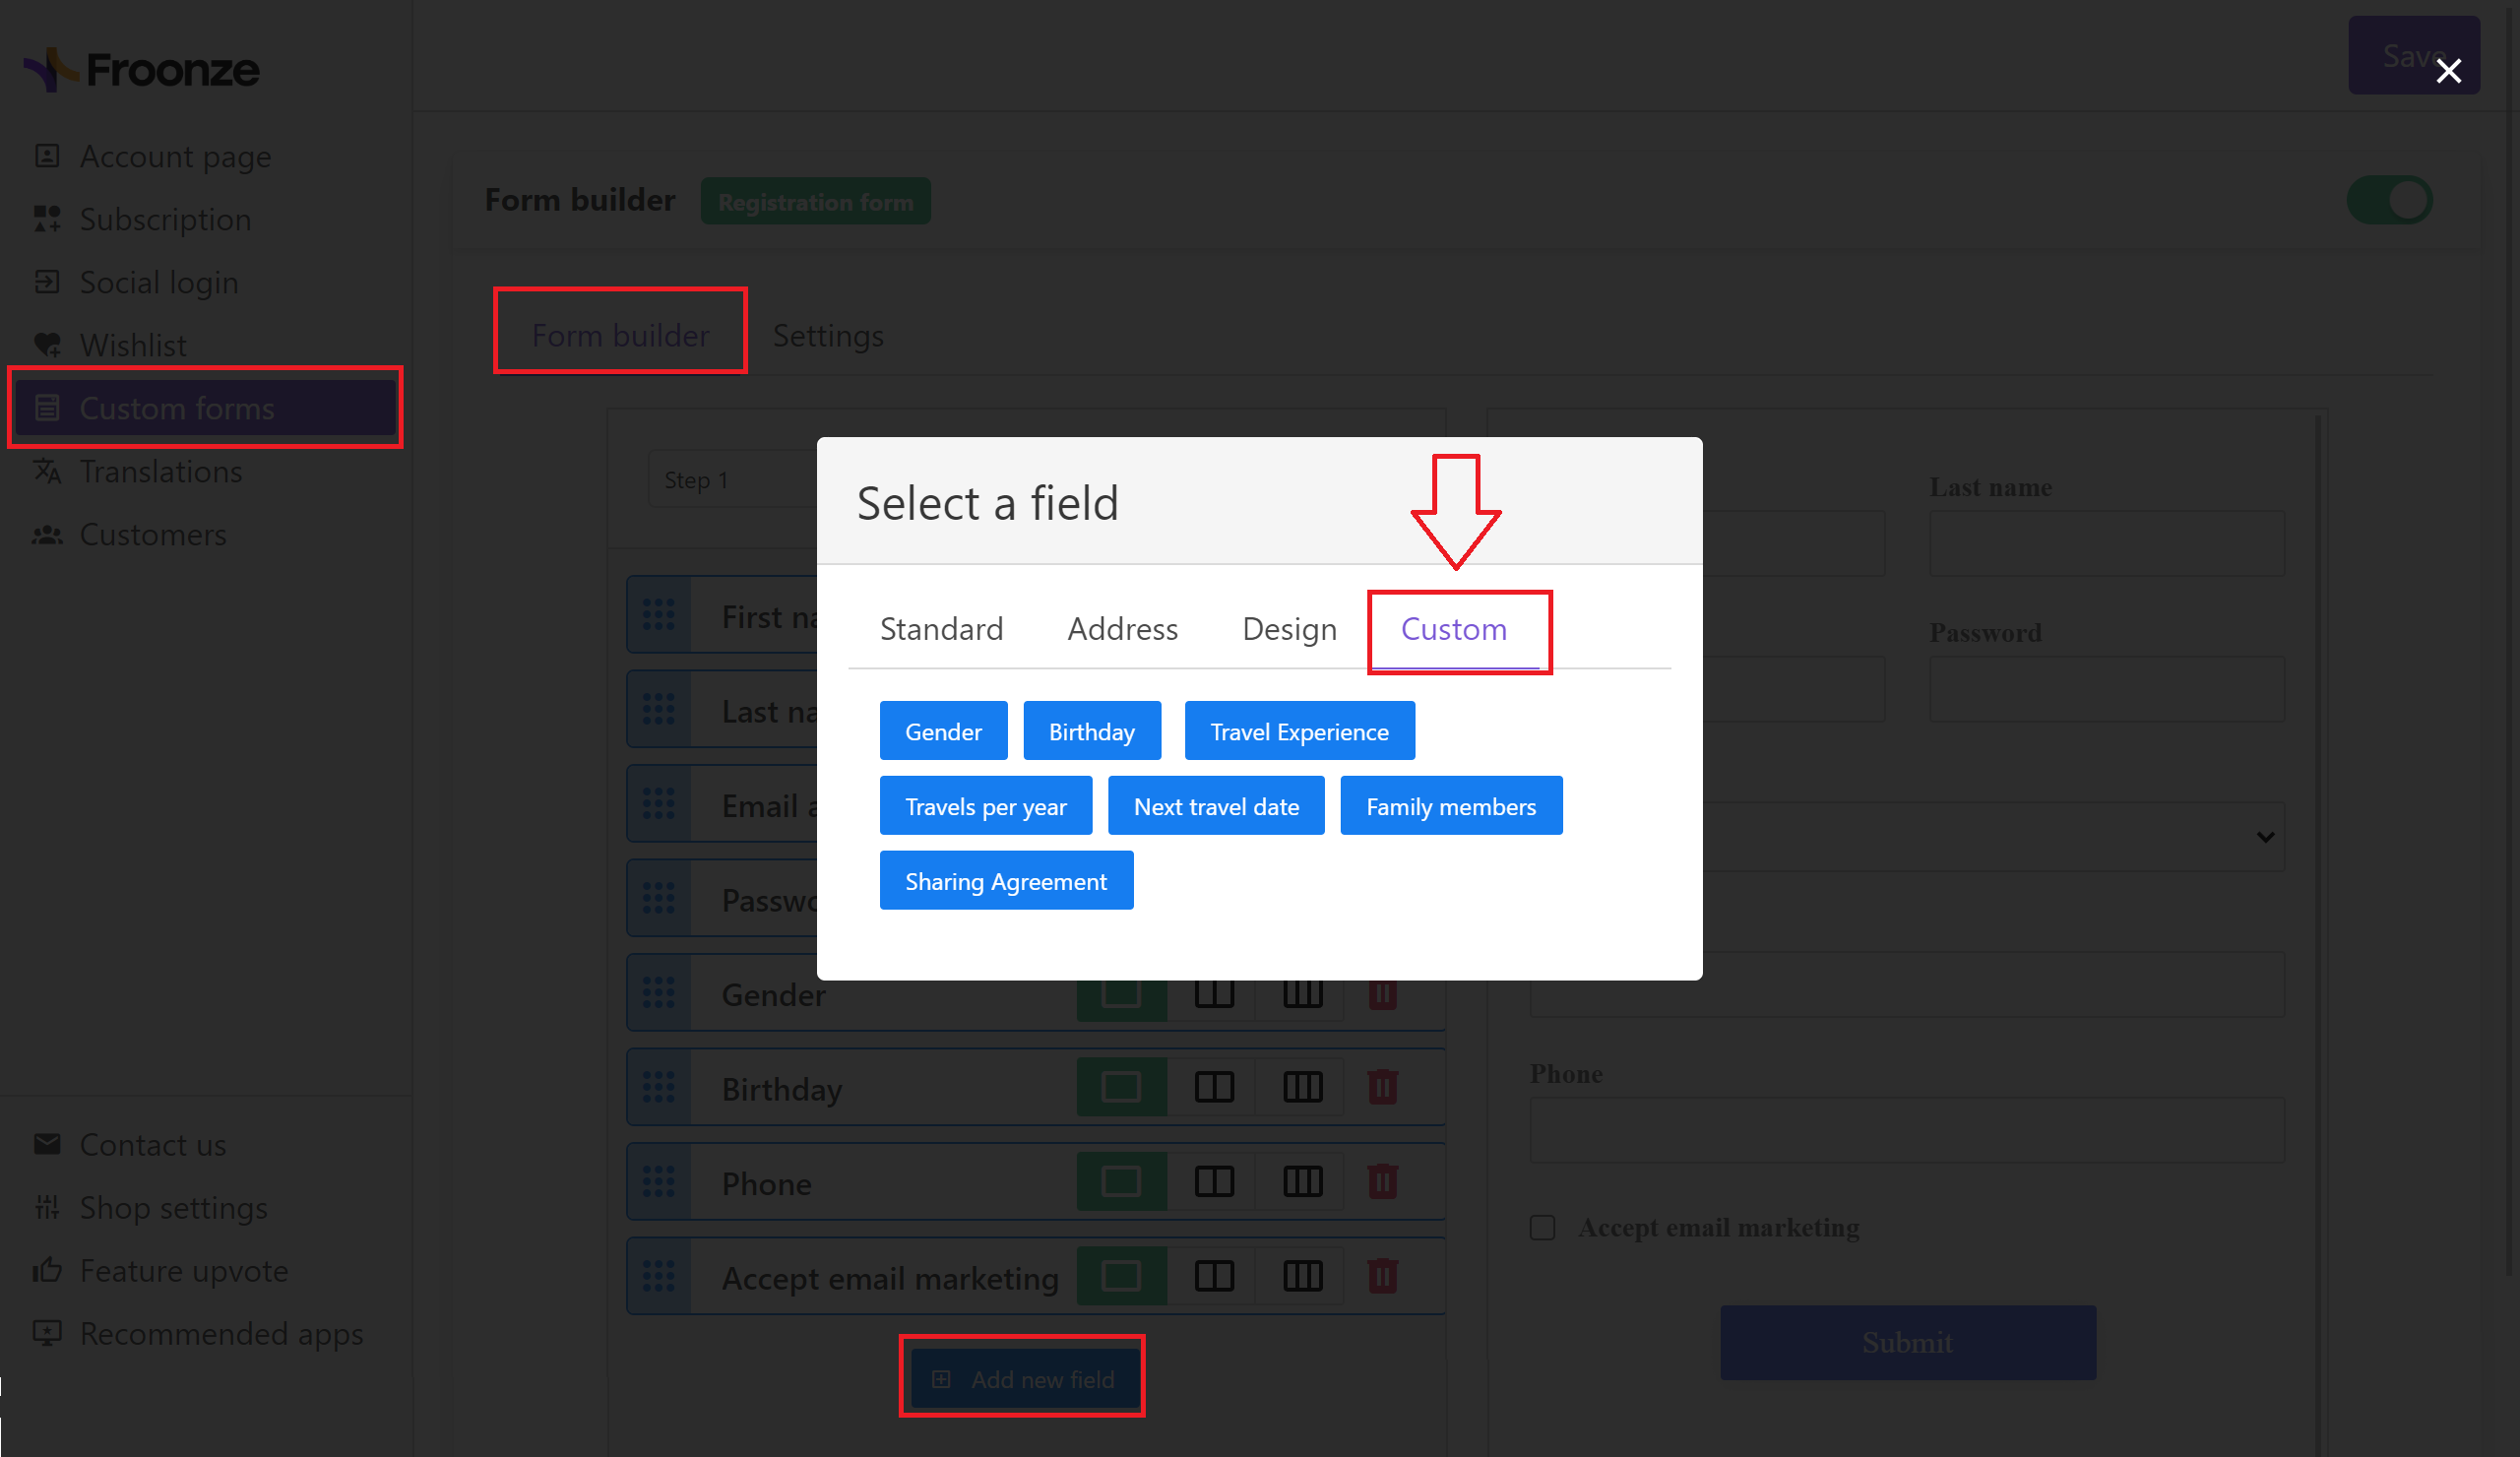
Once that you've created the one or many custom fields you need, you can come back to the form builder to finally add these fields to the form where the customers will be able to input their data. Go to our Settings > Custom Forms and open the Form Builder by editing or creating a new form. Then click on Add new field and browse to the Custom category tab to see the fields you have created in the previous step, and click one by one on those you want to add to the form.
If you now click on any of the listed fields you'll see on the right side the Field Settings with some of these settings being common to most fields like it's the case of labels, descriptions, placeholders, default values and validation rules. But there is a setting that is specific to custom fields and this is the Input type.
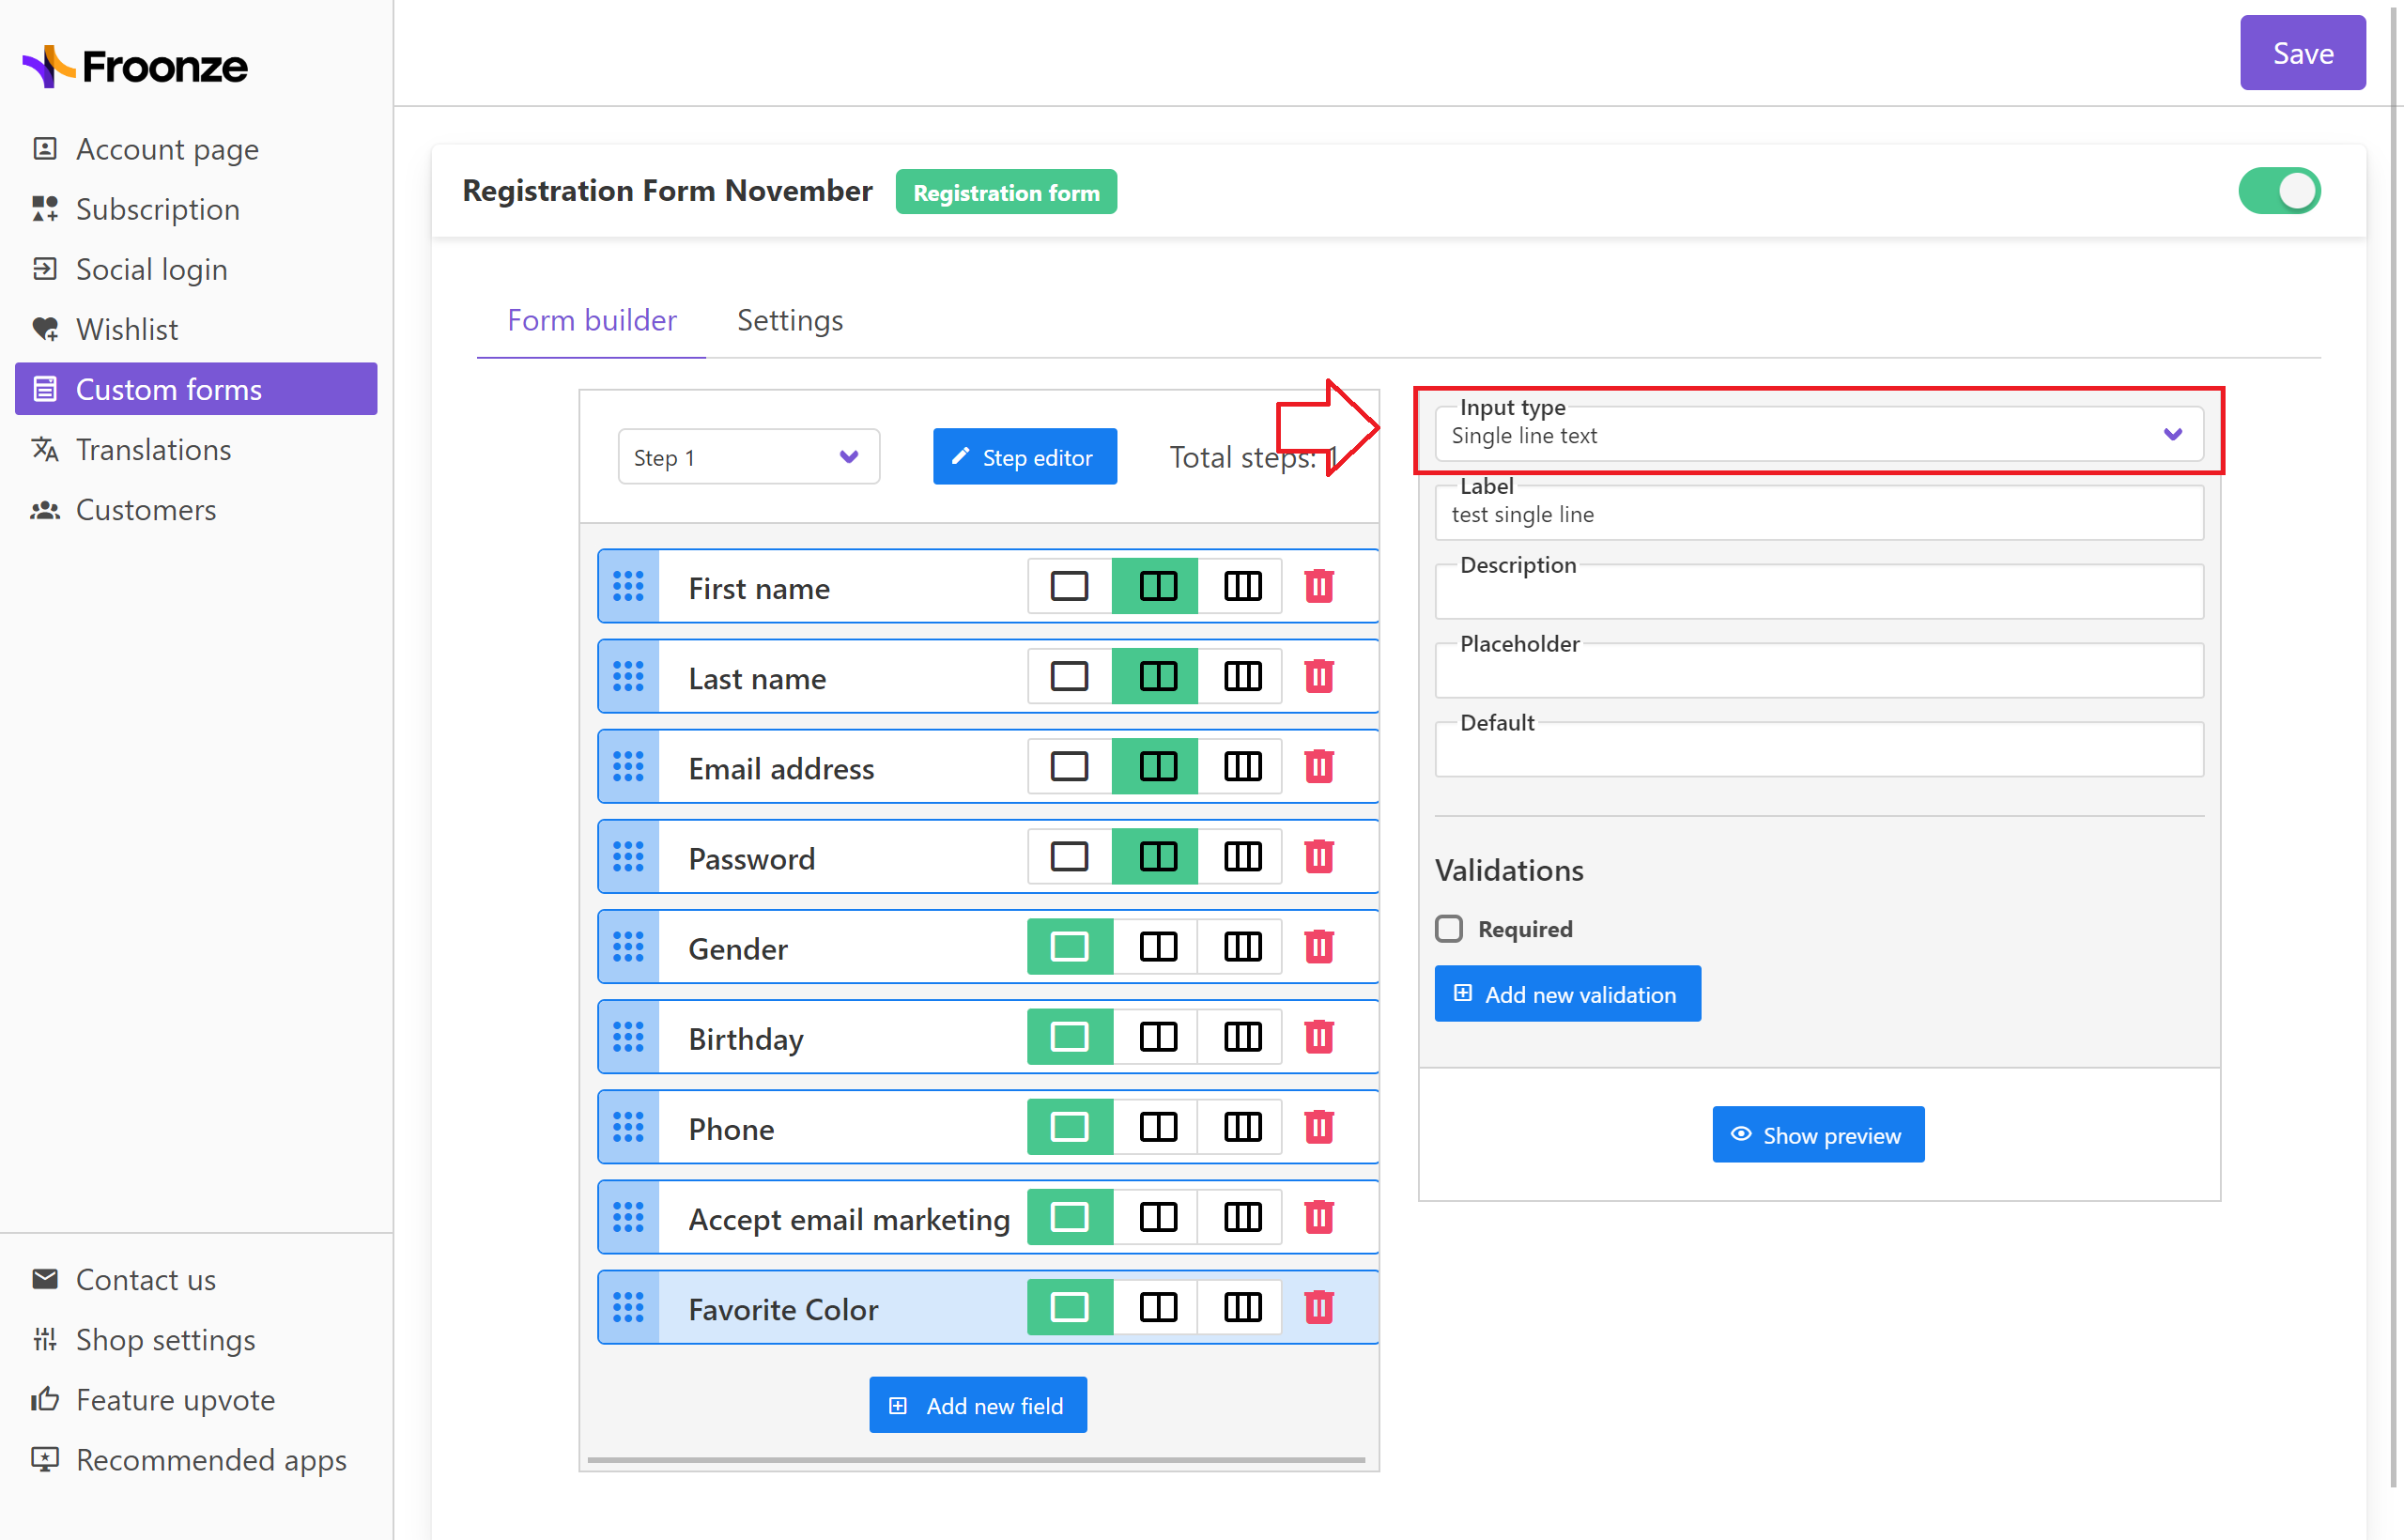
The input type refers to how the customer will be able to input the value in the field, and in most cases it's strictly related to the type of data that the field is collecting, for example:
- Multi_line_text type fields will be restricted to be textareas (where the customer can input one or different words)
- Date type fields will be restricted to a date input (a date picker to select a date)
- Boolean type fields will be restricted to be checkboxes (a box to tick yes or no values)
- Multi_choice type fields, since are also defined to be used with text or numbers, are also restricted to be displayed as a multi-choice input (an array of checkboxes where the customer can tick one or more of a predefined set of values)
- Gender and Birthday, that are built-in custom fields in our app, will also have specific input types, dropdown and date respectively
The other three data types (single_line_text, number_integer, number_decimal) however, will allow you to select among 3 different types of inputs, those inherent to the type (single line text for manual inputs of text, number integer for manual input of integer number, and number decimal for manual input of decimal number) and also 2 other input types: radios and dropdowns to let the customer choose one value from a predefined set of values that need to be set up along the field.

Check out our demo case here.