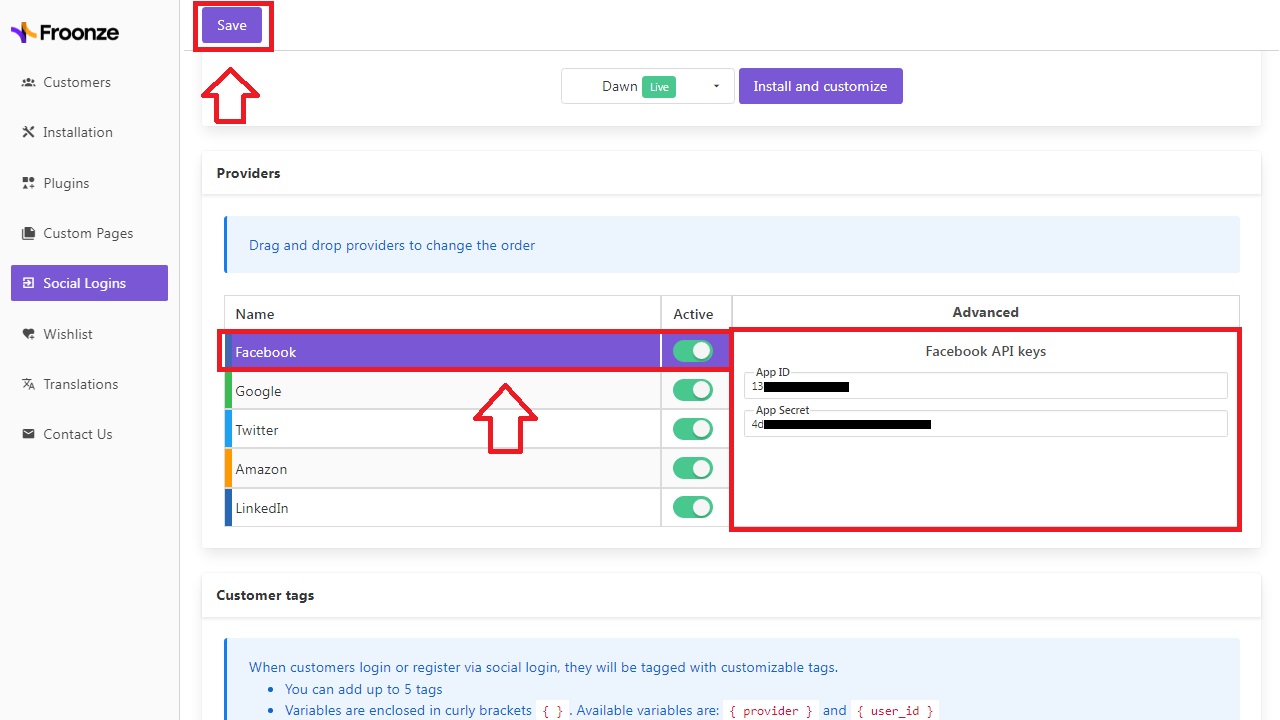
Facebook API key pair

Froonze
Last Update 4 เดือนที่แล้ว
Note: due to recent changes to Facebook's policies, it is required to have a Facebook Verified Business Account before you can create a Social Login app in the Facebook Developers Console with the right permissions.
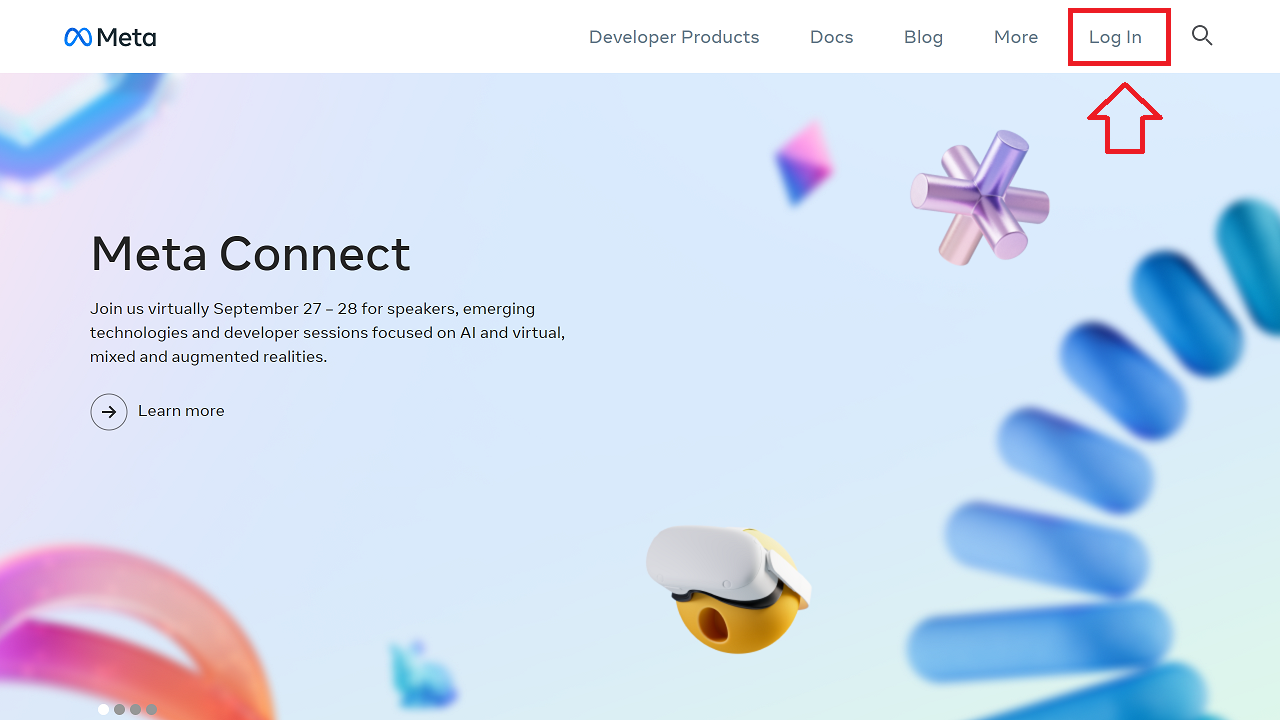
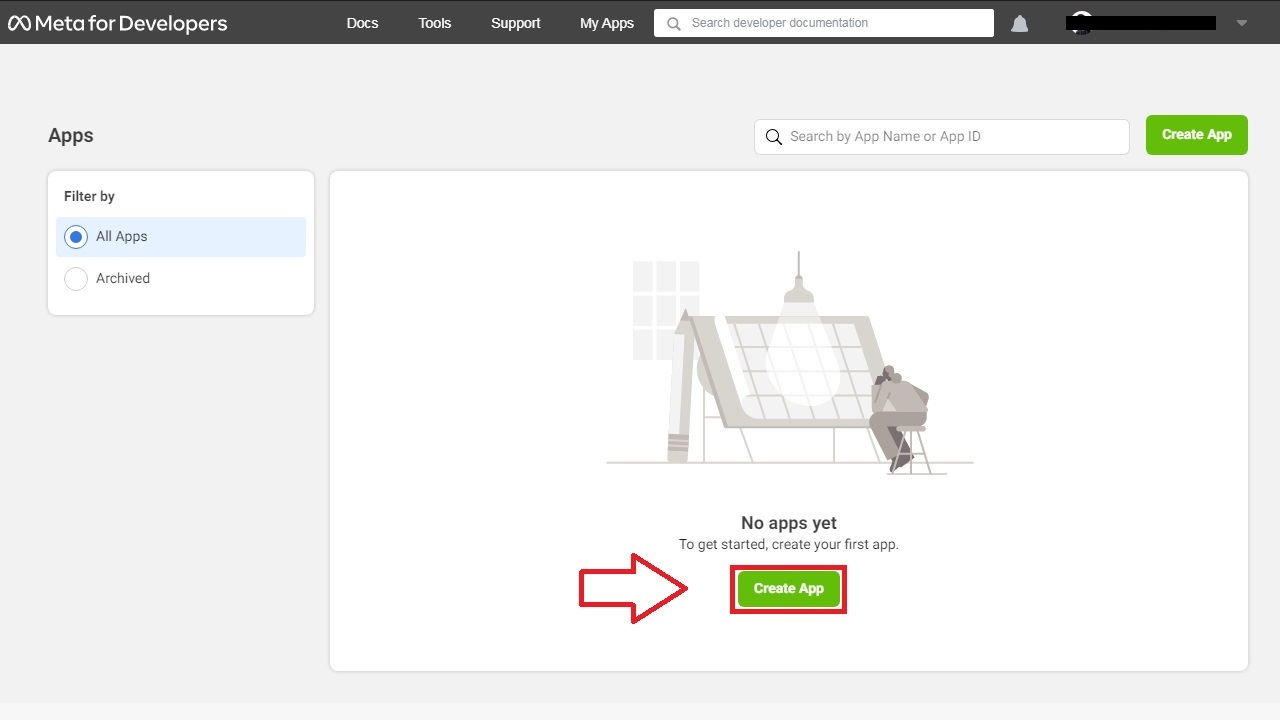
Step 1: Go to Facebook Developers at https://developers.facebook.com and log in using your Facebook account credentials. Once logged in, go to My Apps.

Step 2: Click on "Create App"
Select "Authenticate and request data from users with Facebook Login", then click Next. As you see when you expand this option, it comes with some requirements such as Business Verification, Annual Data checkup and Data Handling questions
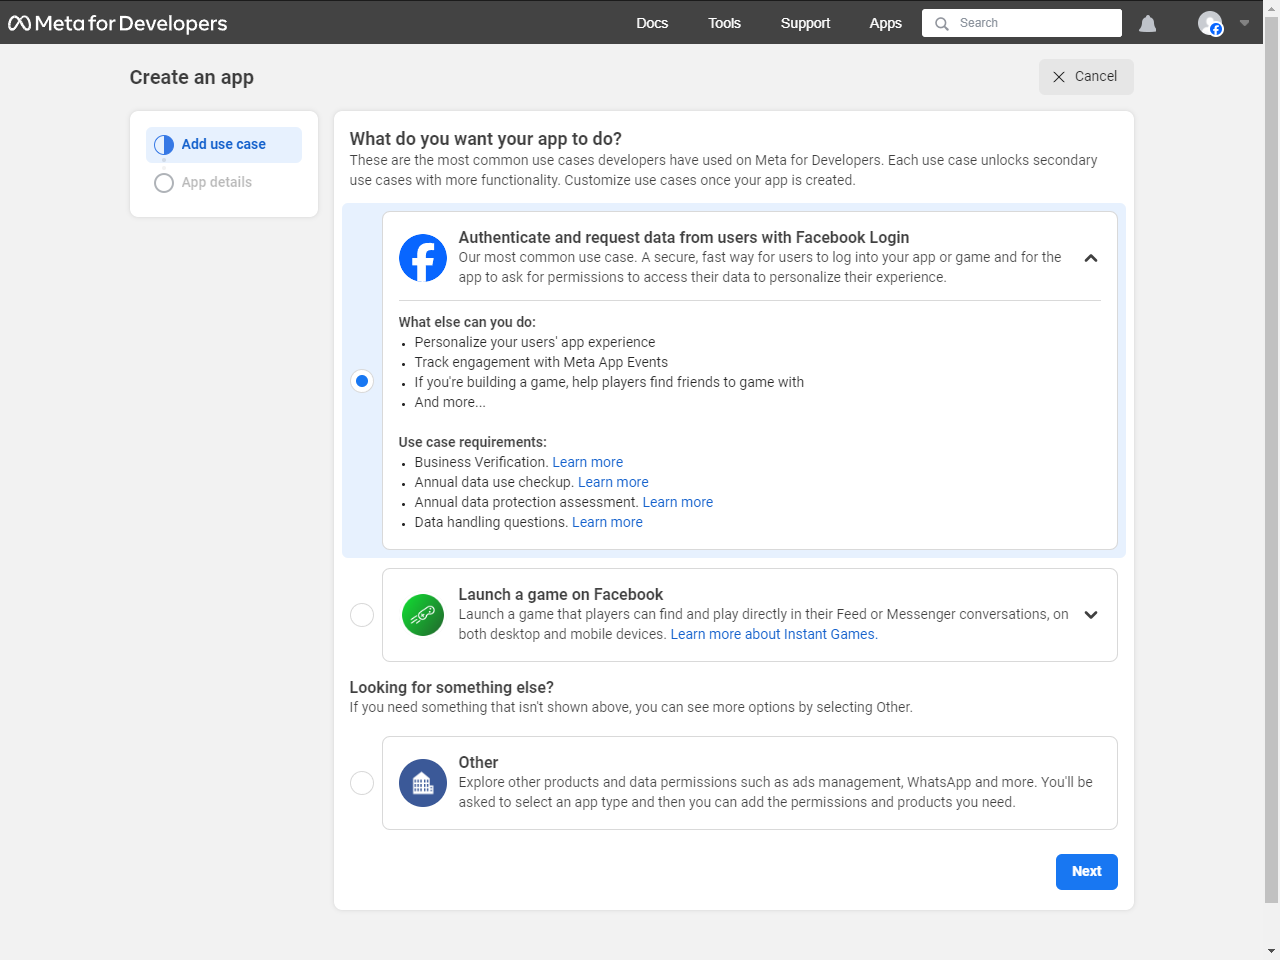
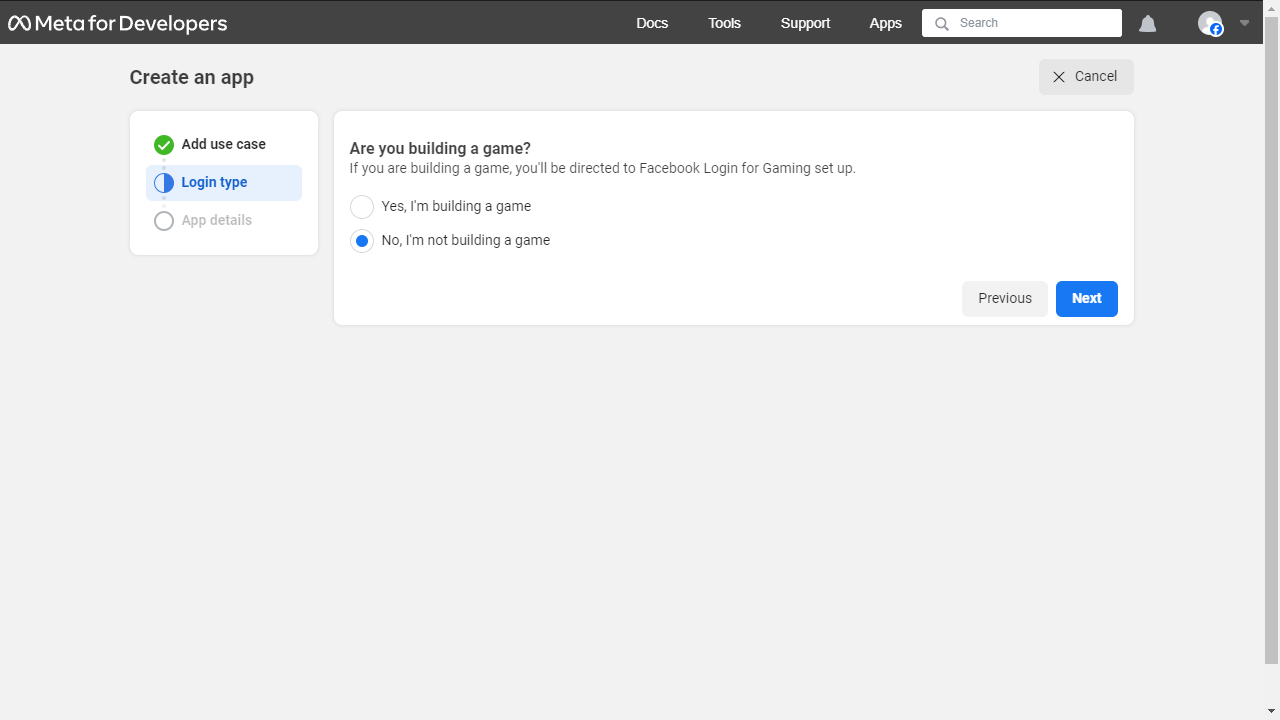
After that you are asked whether if you are building a game. Select "No"
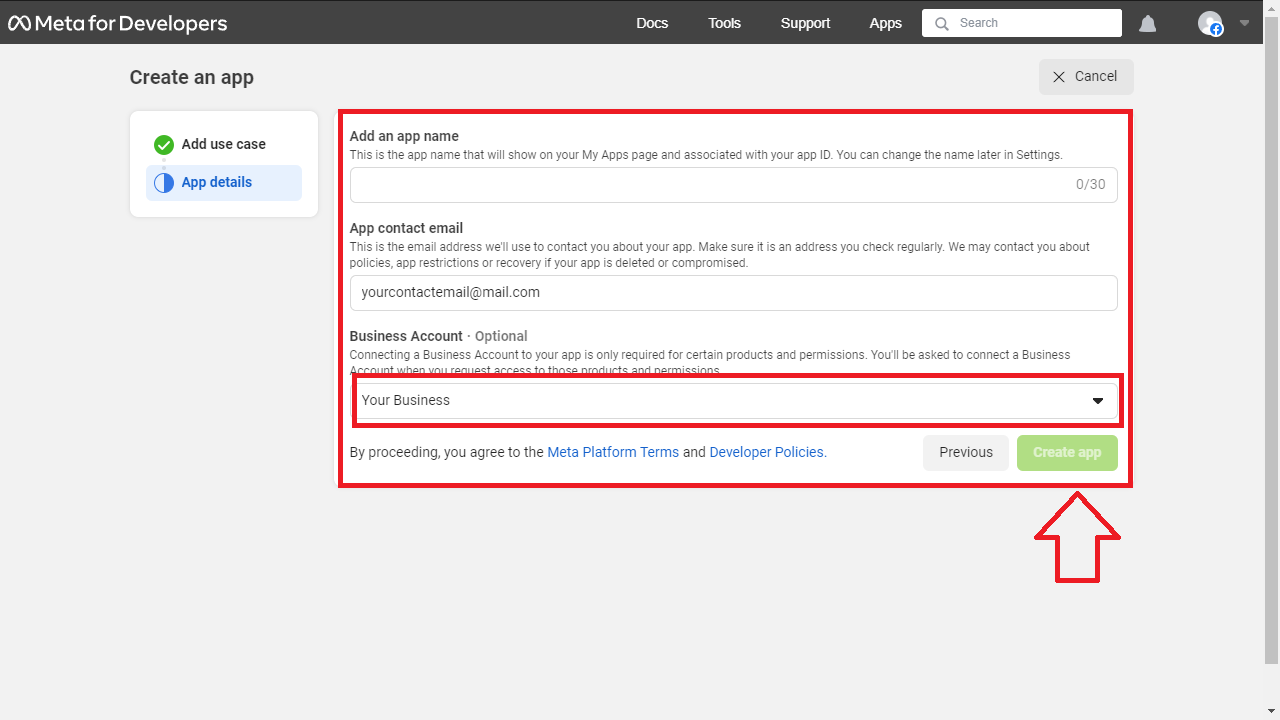
Next, at App Details, fill in the App name and Contact email. You must also select your Business Account in the dropdown.
Then click on Create app again and re-enter your password to confirm.
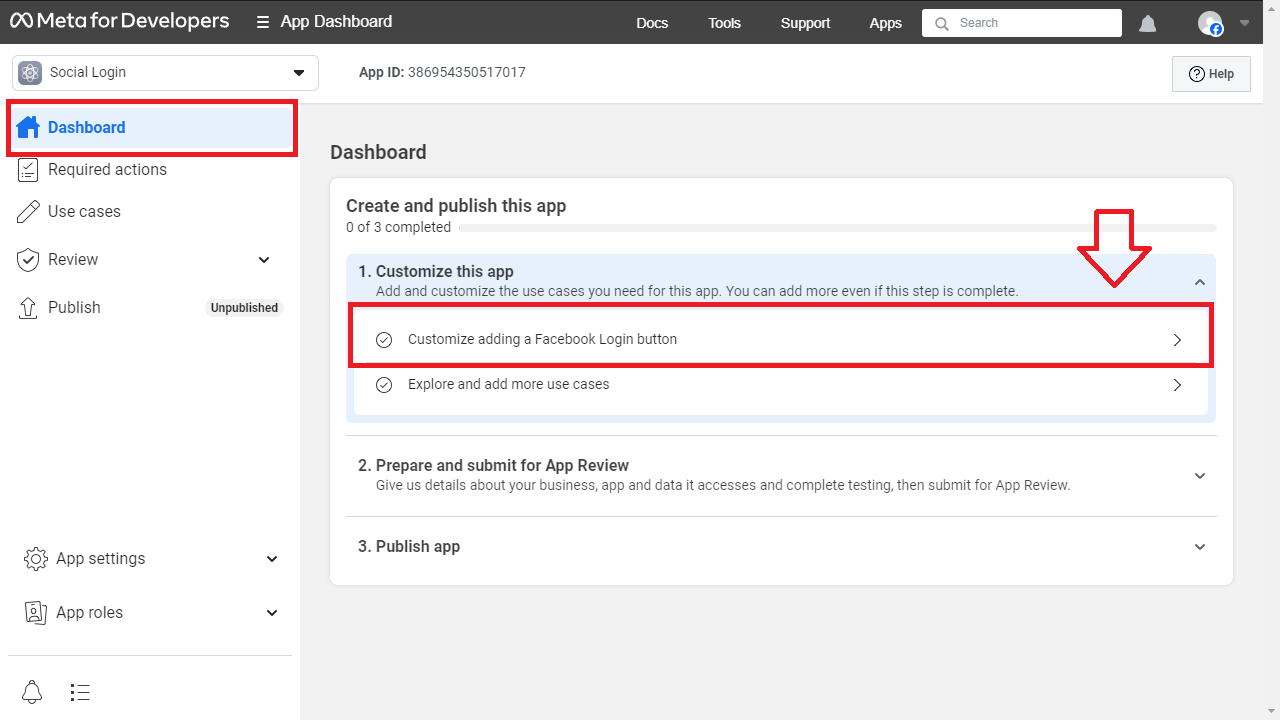
Step 3: The next page will get you to the App Dashboard panel (you can also get there by clicking "Dashboard" on the left navigation bar).
Click on Customize adding a Facebook Login button
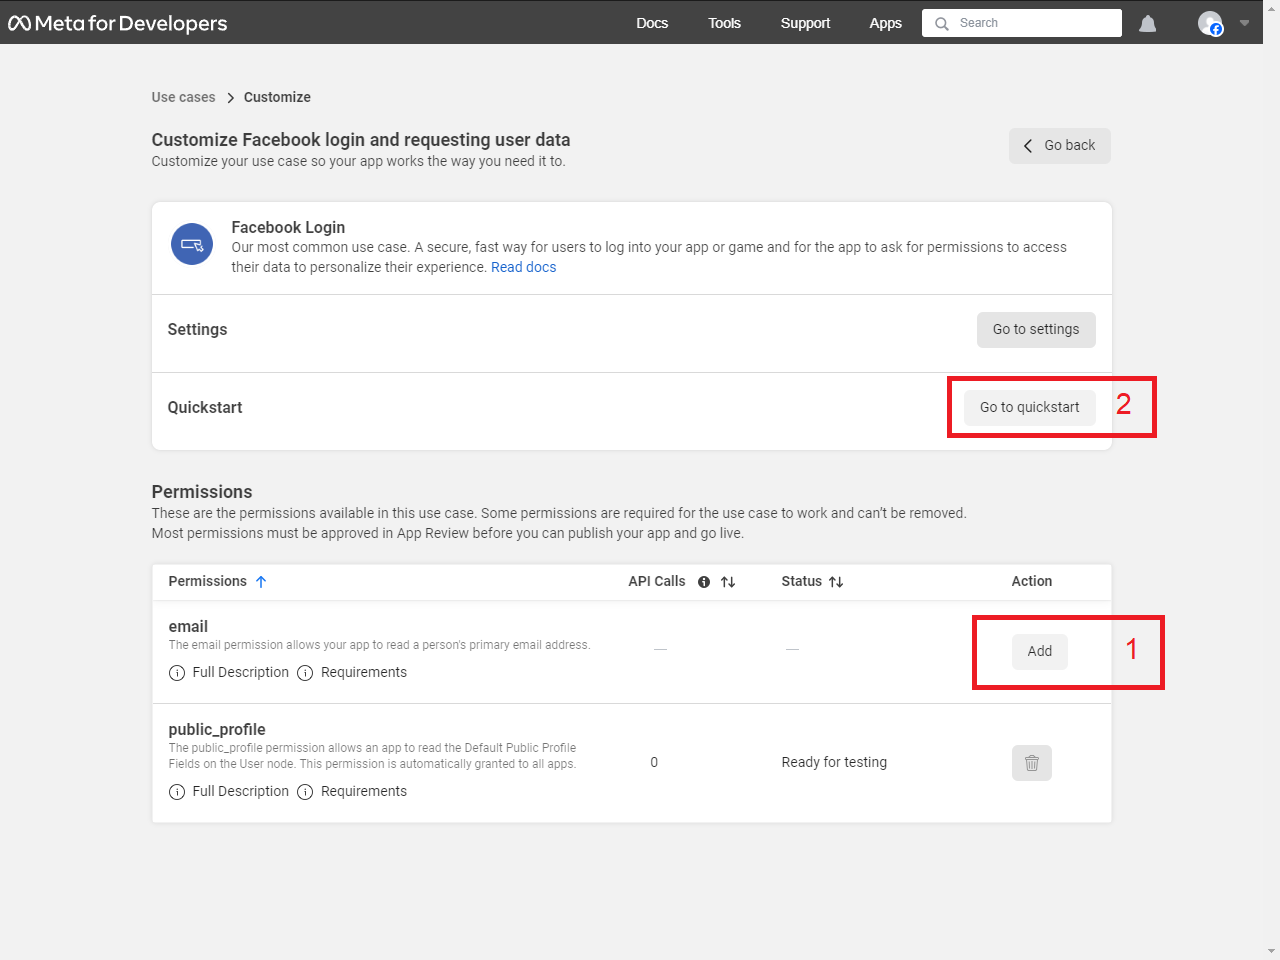
On the next screen, first click on Permissions > Email > Add.
You may see a prompt informing you of additional required steps, but we can leave this for later.
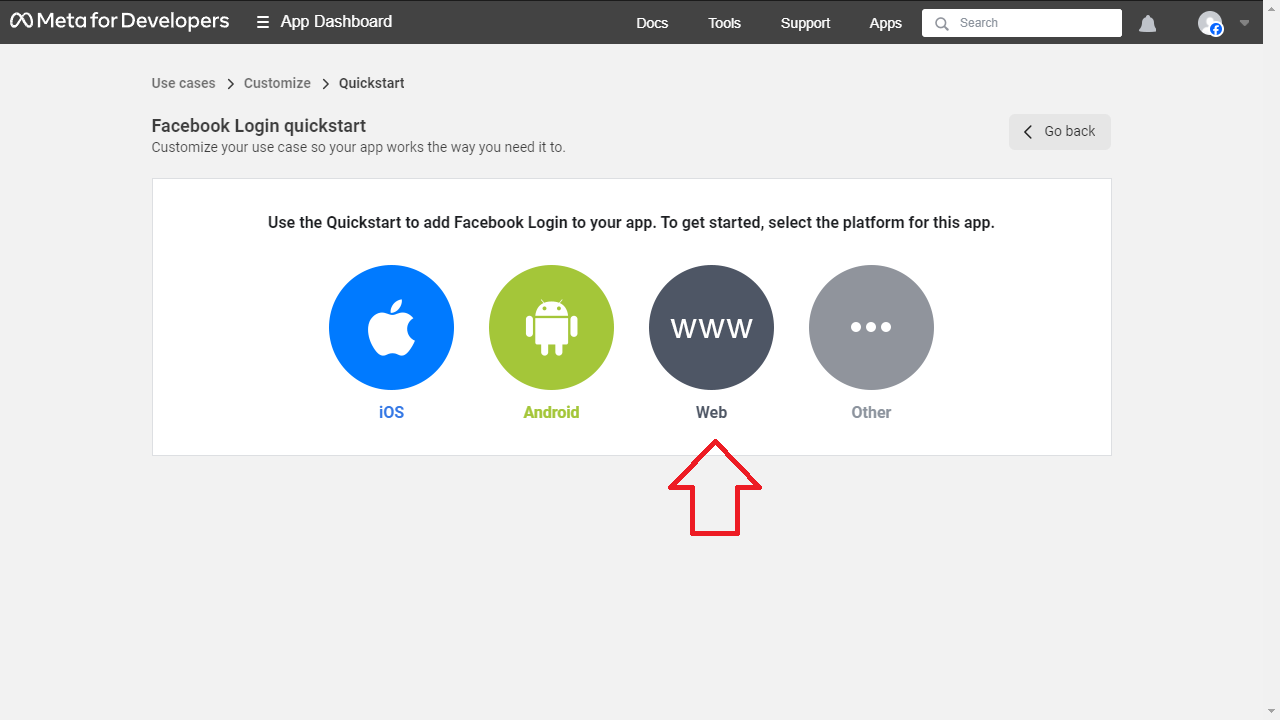
After that click Go to quickstart
Choose Web.
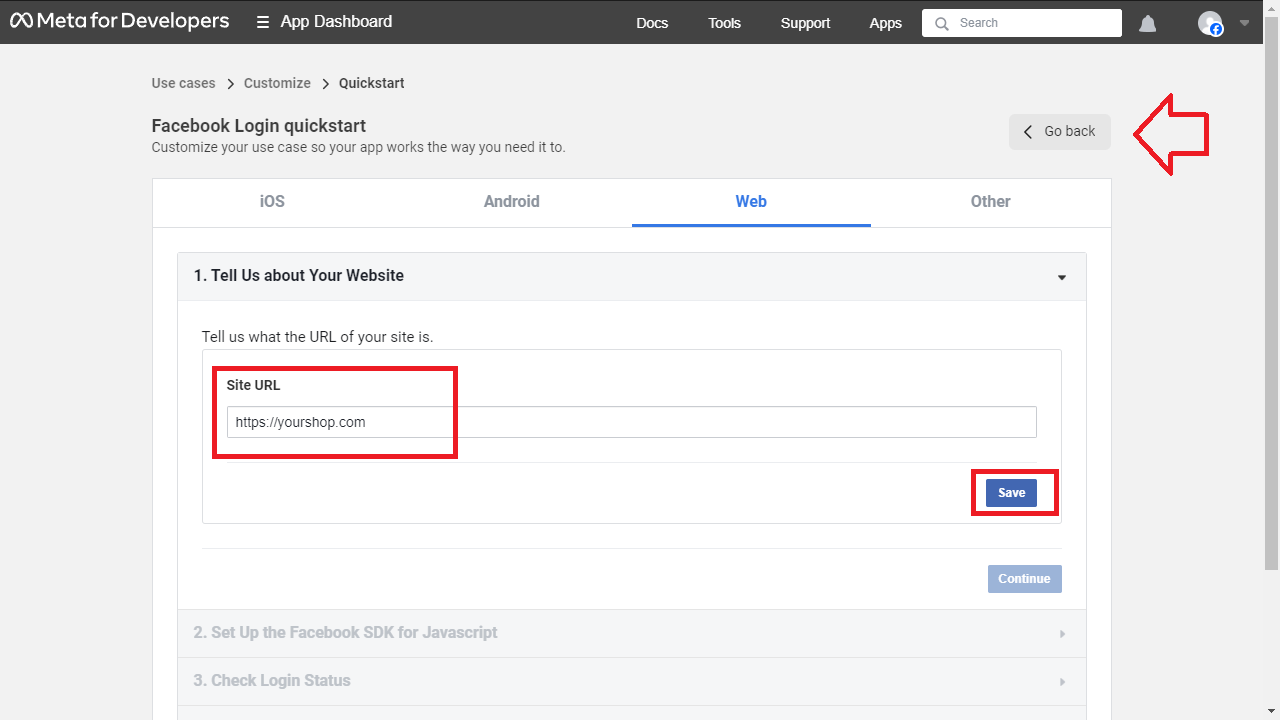
In the expanded section, enter your site's URL and Save.
After that click on Go back, to return to the previous panel.
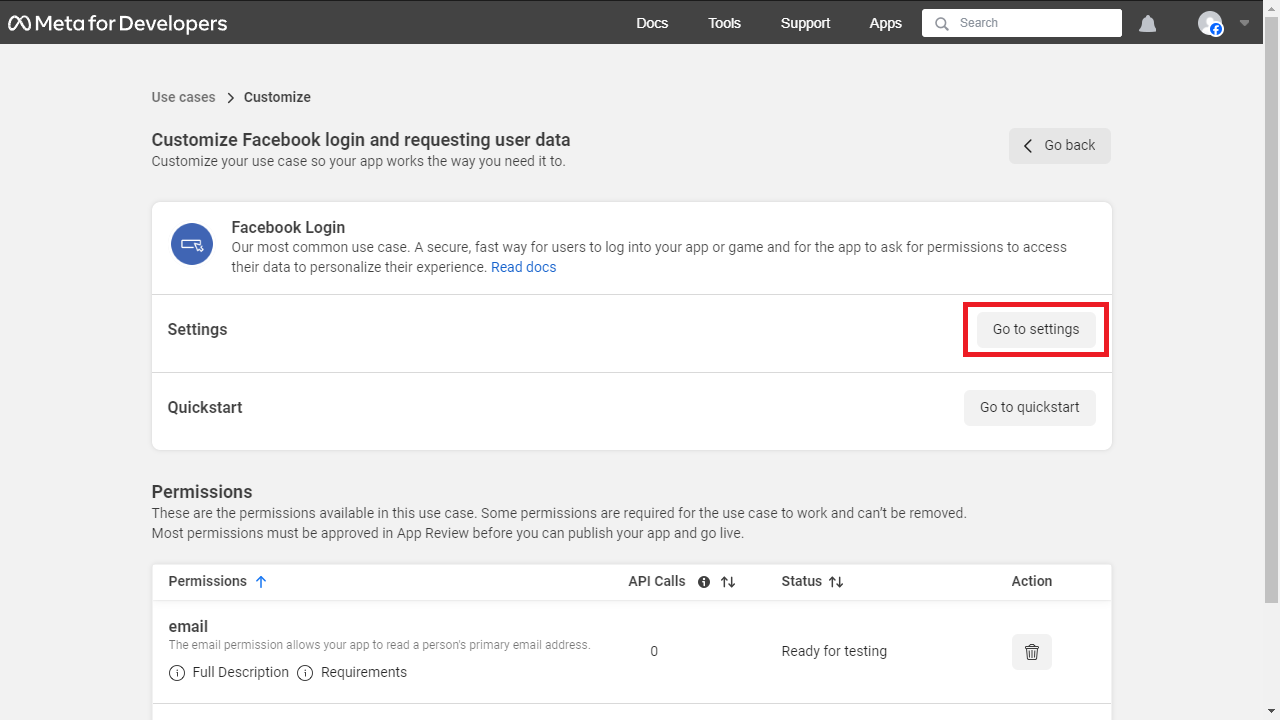
Step 4: Back in the Customize panel, click Go to Settings
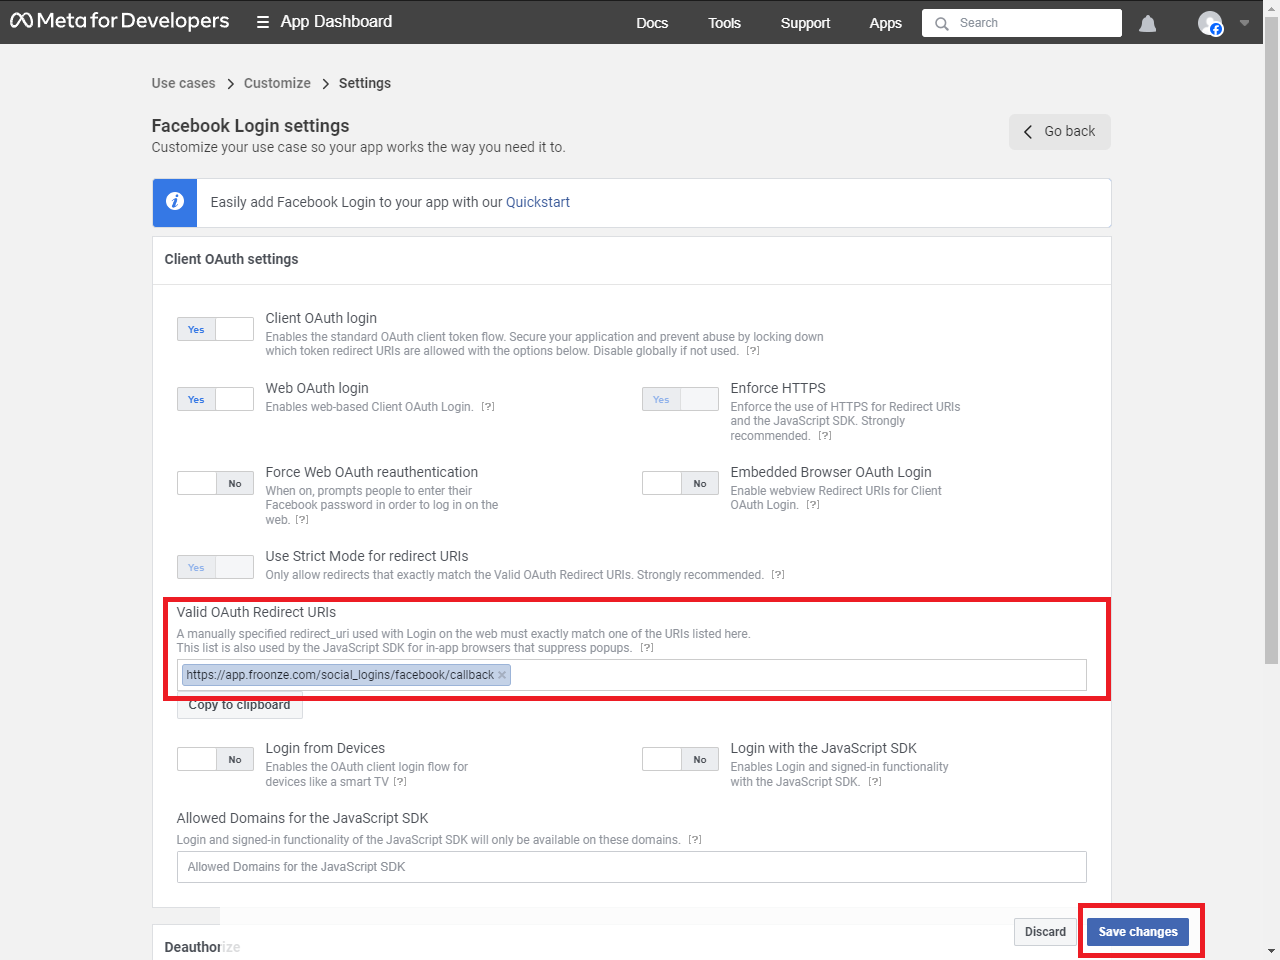
Fill in the Valid OAuth Redirect URls field with our Return URL https://app.froonze.com/social_logins/facebook/callback and Save Changes
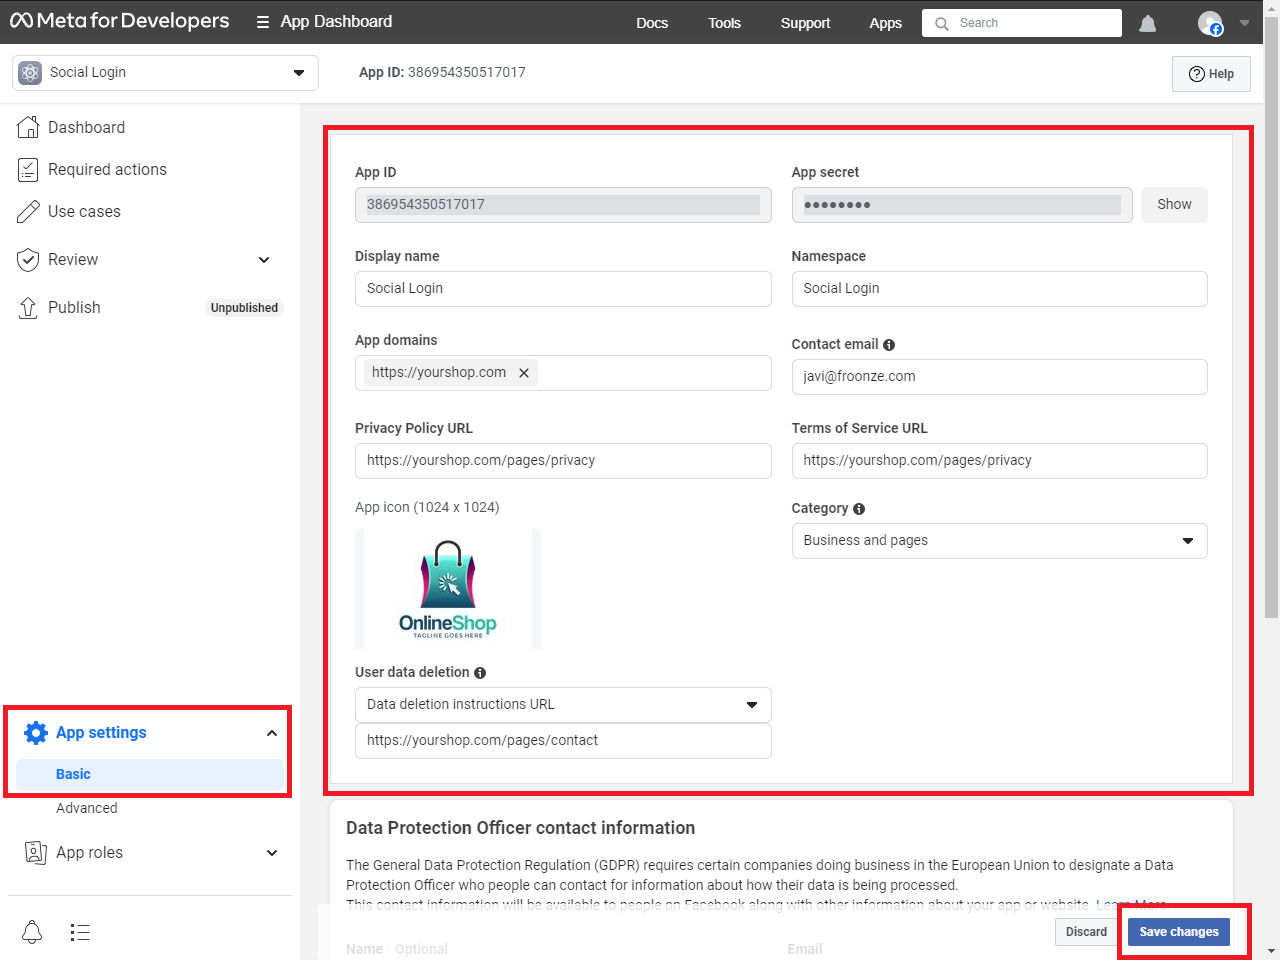
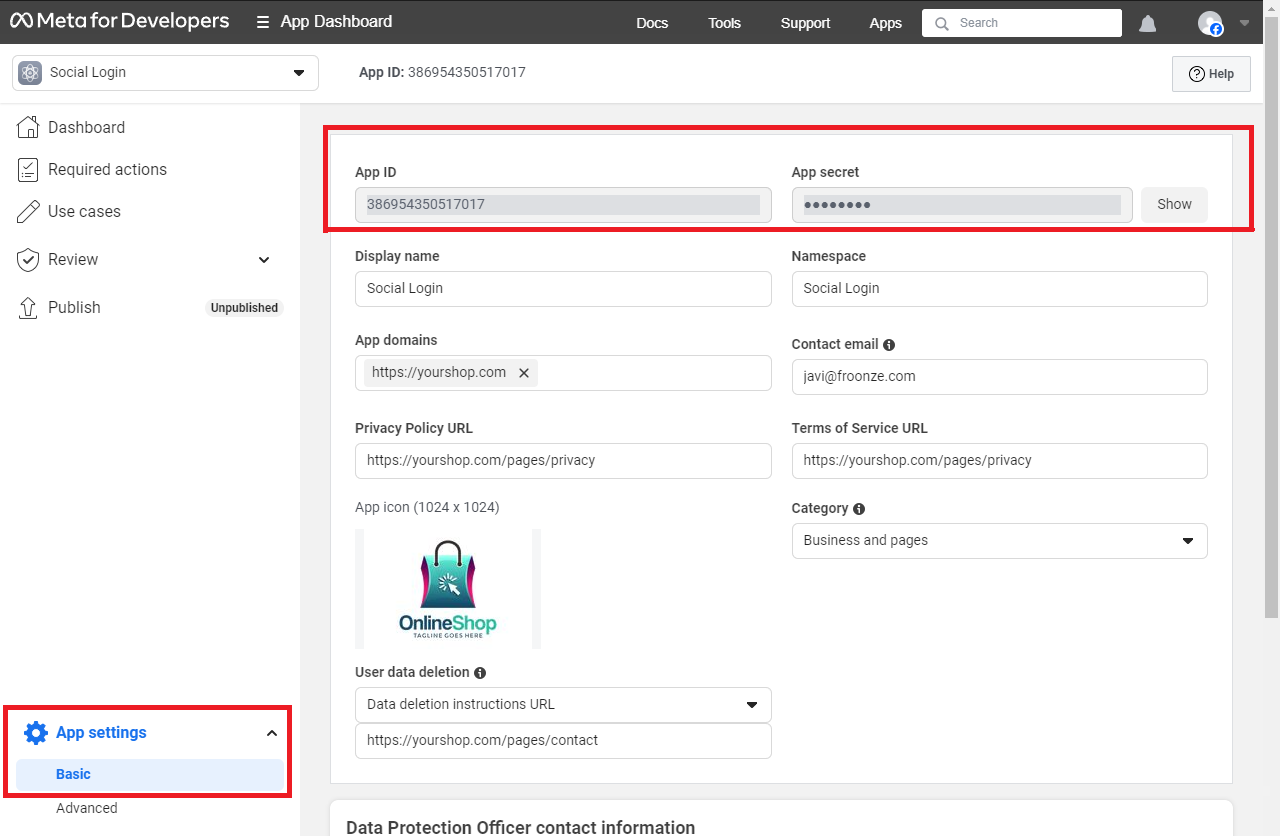
Step 5: The navigation seems to be buggy in Facebook so at this point we were redirected to a blank page. If this is your case as well, use the Back buttons in your browser to go back to the main dashboard. Once there, click on App Settings > Basic
Fill in other required fields: Namespace, App domains, Privacy Policy URL, Terms of Service URL, App Icon and Category.
Also a Data Deletion Instructions URL. Here you need to link to the policy page on your site where you mention more details about how you manage customer Data Deletion (which could be the same URL as your actual Terms of Service or a Contact page).
Then click Save changes
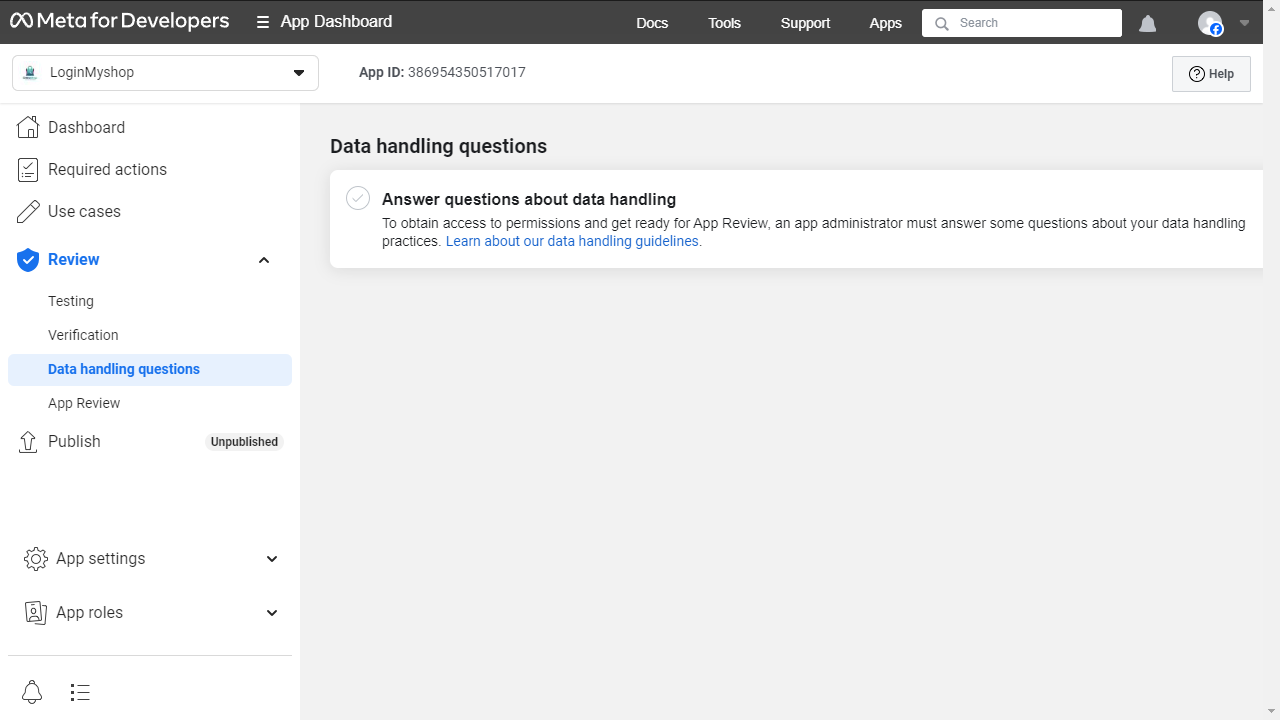
Step 6. With a Verified Business account, you can now navigate to Review > Data handling questions, and click Answer questions about data handling
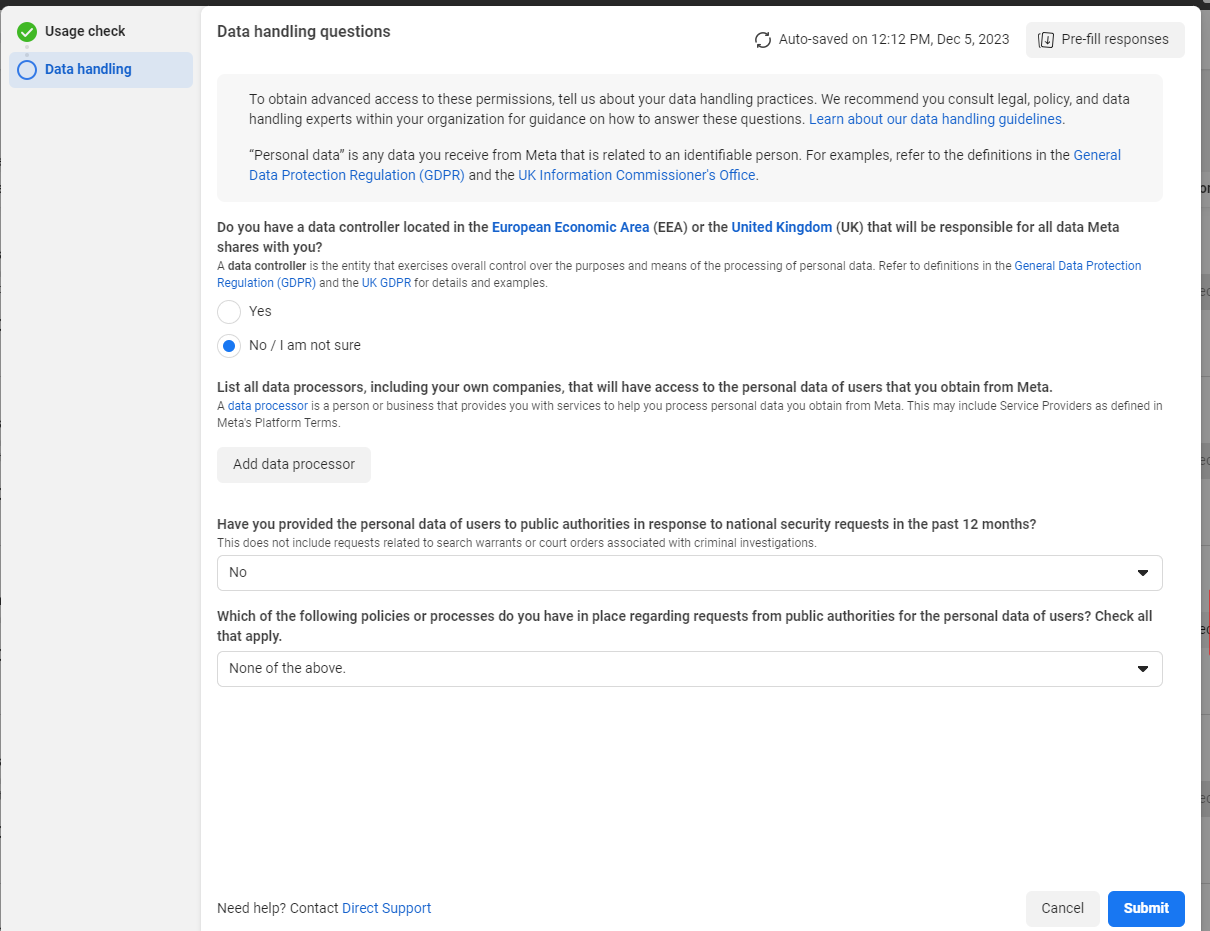
You will be guided through a simple questionnaire. Select again your Business account and fill the form.
In this form you can add us as a Data Processor if you consider it necessary: Froonze Limited, the country where we process data is US (where our servers are located)
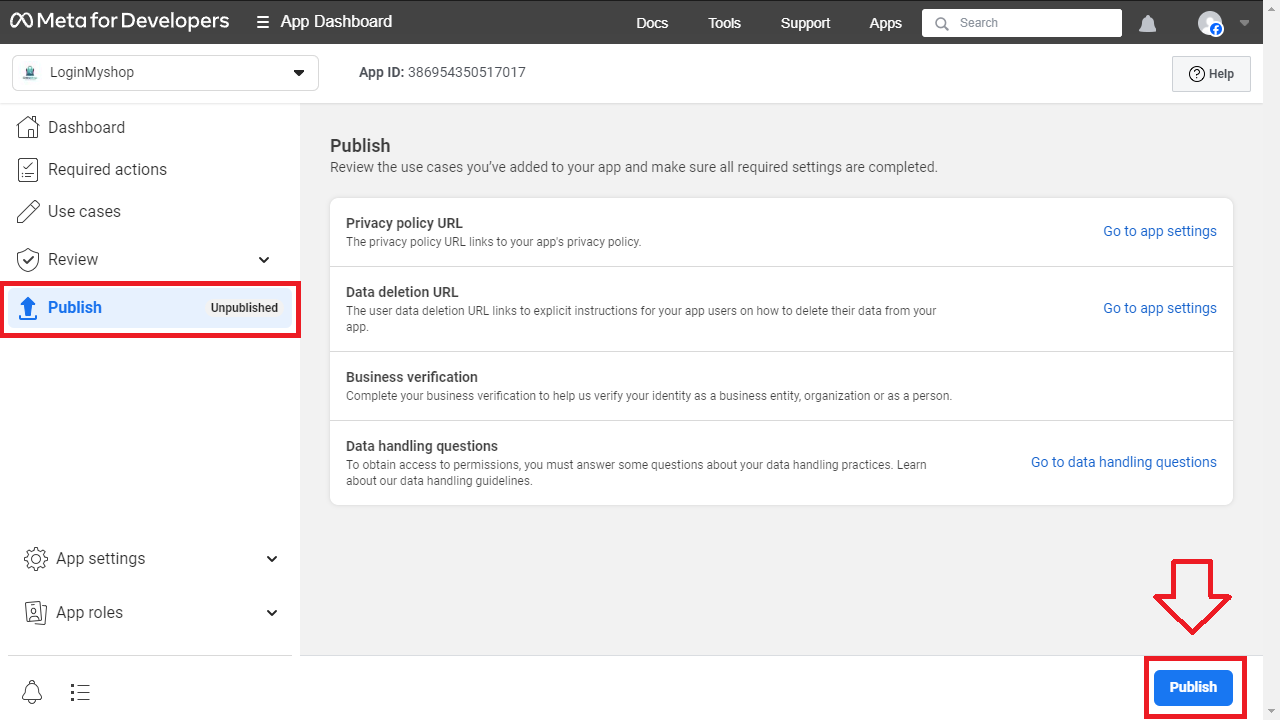
Step 7. Once you submit the form, you should be able to go to the Publish panel to Publish the app
Step 8. Navigate back to App Settings > Basic to copy both the App ID and the App Secret. You’ll need to re-enter the password to reveal the Secret
Step 9. To finish setting up the app, copy both the ID and the Secret into our Social Login Settings, and Save there one last time.