Google API key pair

Froonze
Last Update 4 maanden geleden
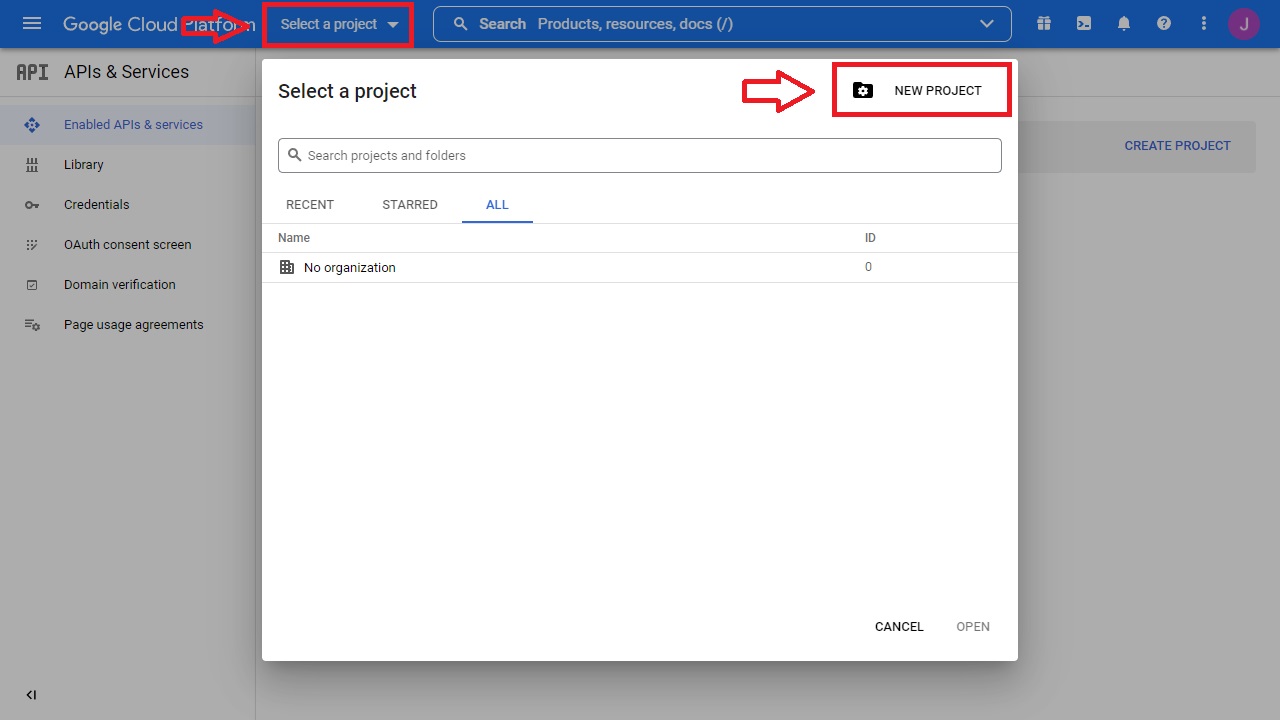
Step 1: Log into Google and go to the APIs and Services console at https://console.developers.google.com. Click on "Select a Project" on top, then on "New Project"
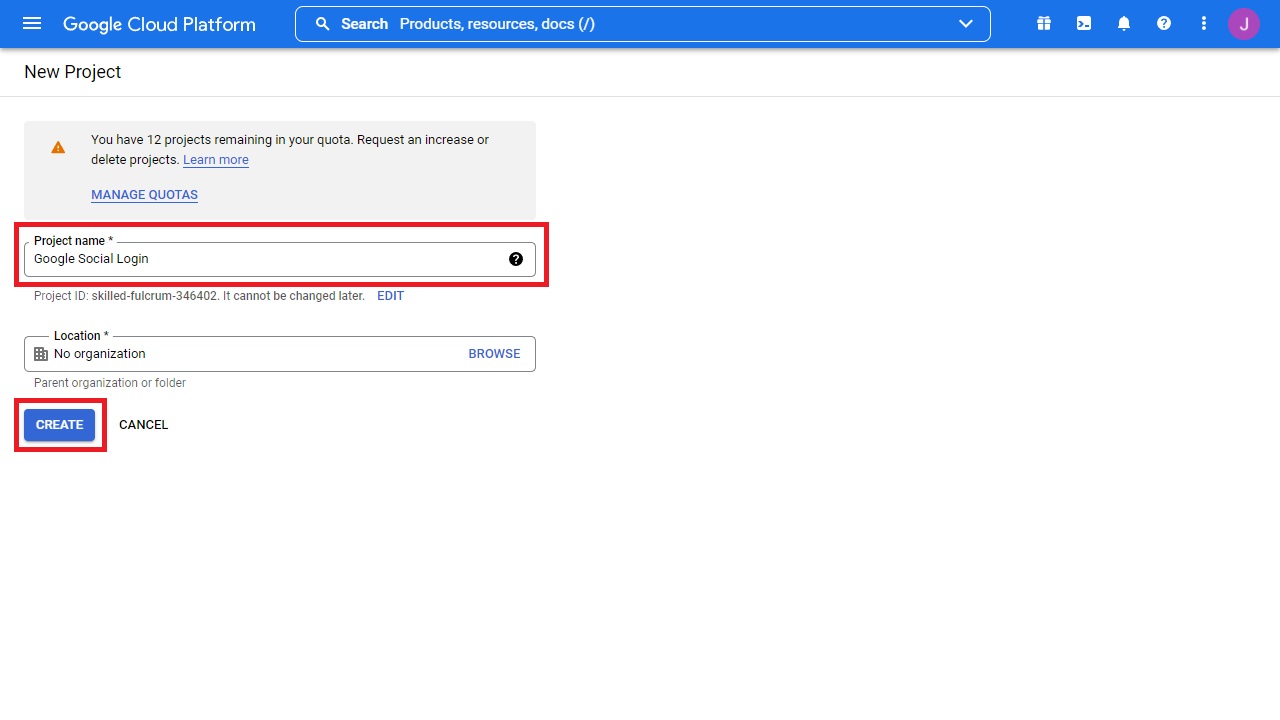
Give a name to your project and click on "Create"
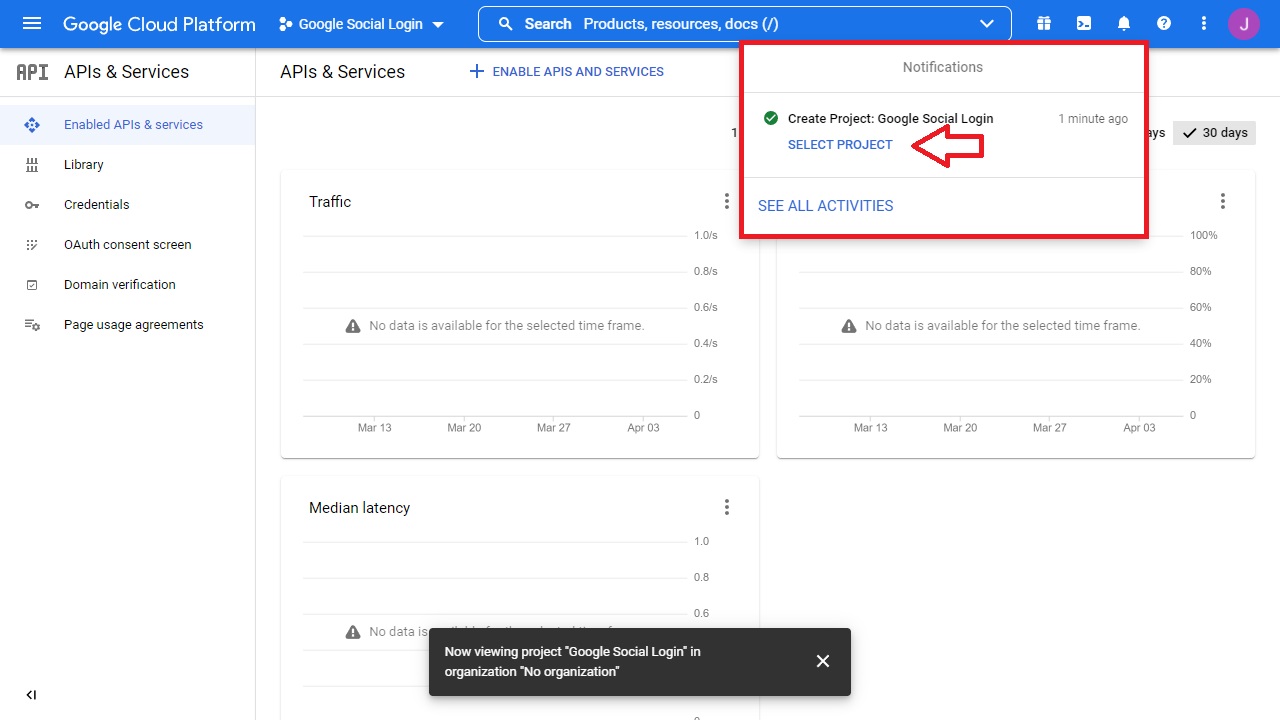
Give it a minute and a notification will show up on the top right corner. Go ahead and click on "Select Project" to select the newly created project
Step 2: Click on "Credentials" on the left navigation bar, then on "Configure Consent Screen"
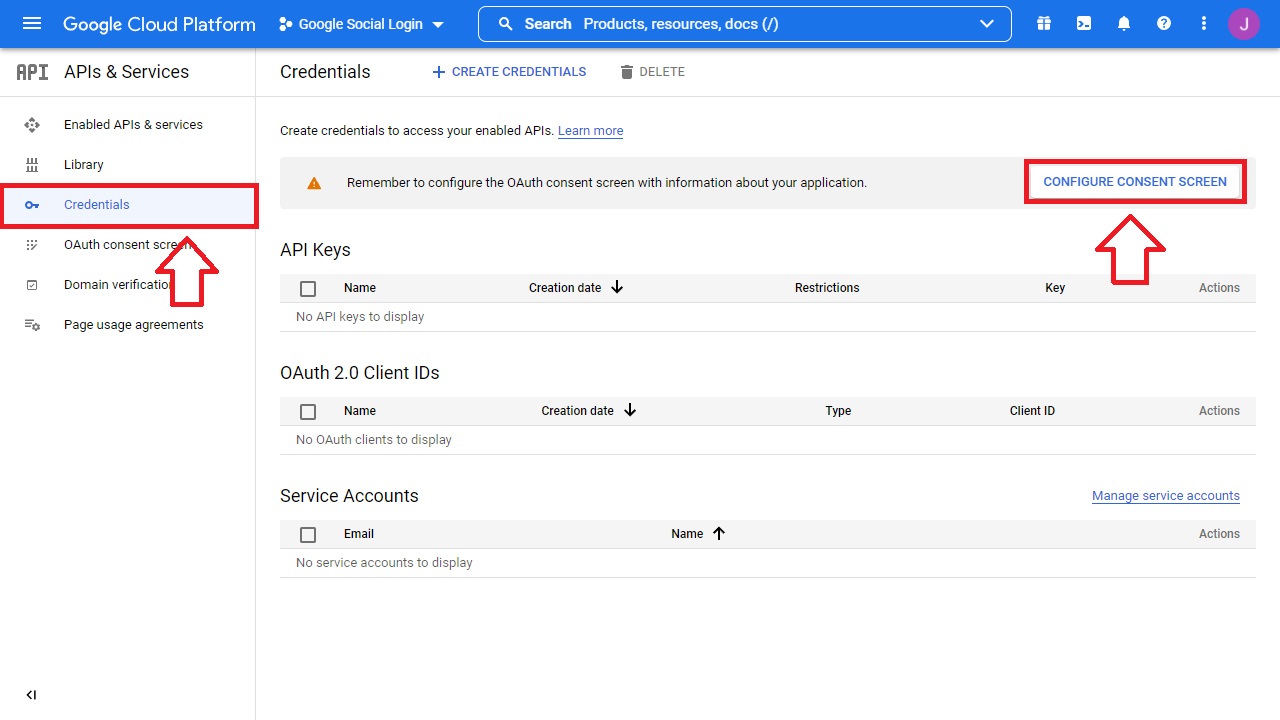
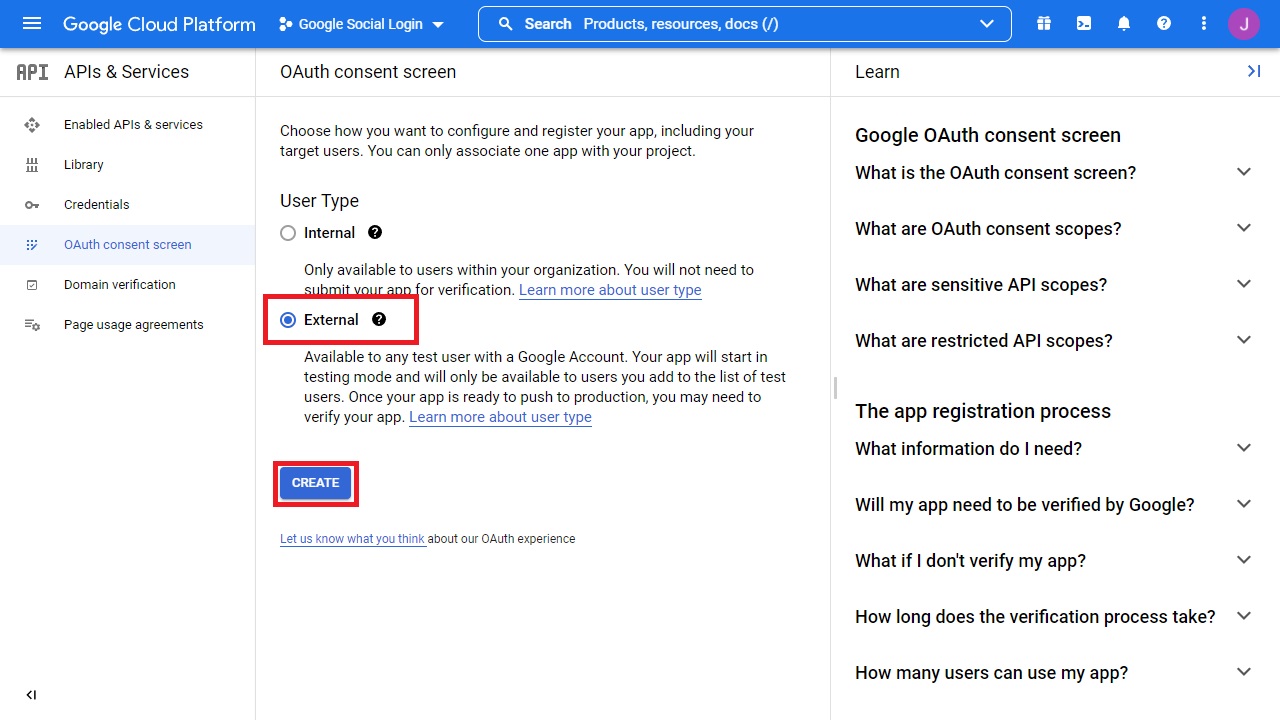
Select "External", then click on "Create"
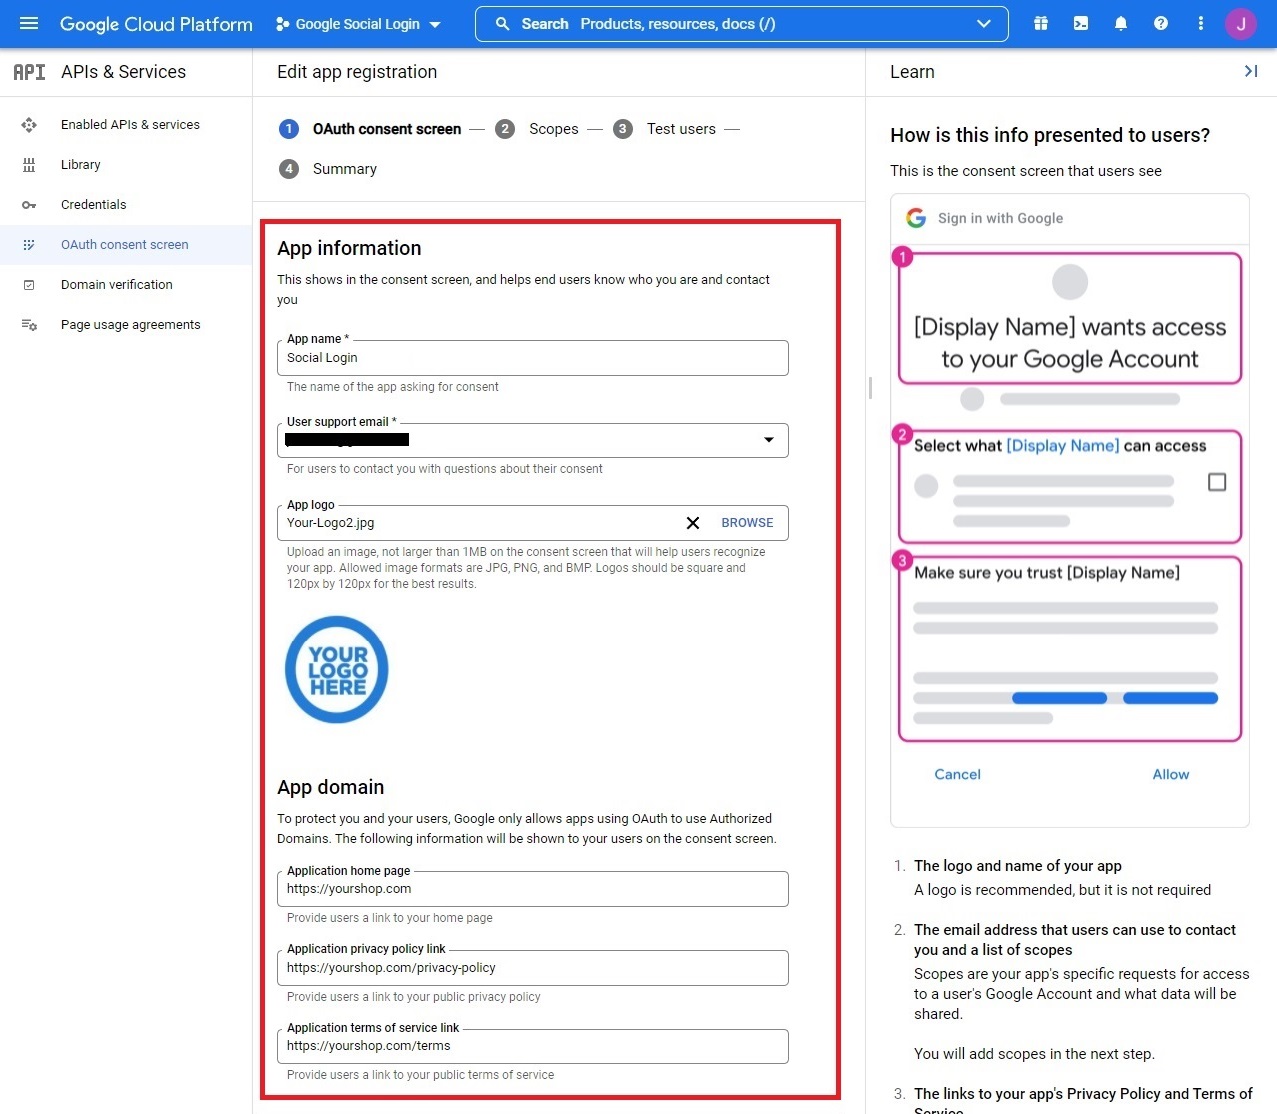
Step 3: You'll be setting up the registration now. On the first panel, OAuth consent screen, fill in the information as required: App name (this is the name your users will see asking for consent), User Support email, App logo* (please take into account that if you upload a logo your app will need to be reviewed & verified by Google through a longer verification process detailed below in Step 8, a logo is not required to finish the app).
On the App domain fields enter your site’s URL Homepage, as well as the links to your Privacy Policy and Terms.
On the same panel, scroll down to Authorized domains. You may receive an automatic warning here at first
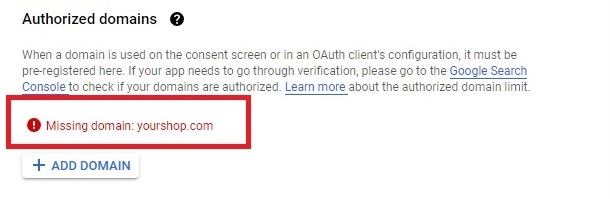
Go ahead and click on "Add Domain". You’ll need to add here your site’s domain (note that you must not specify the scheme, http:// or https://)
Fill in also your admin or Developer contact information, and click on "Save and Continue"

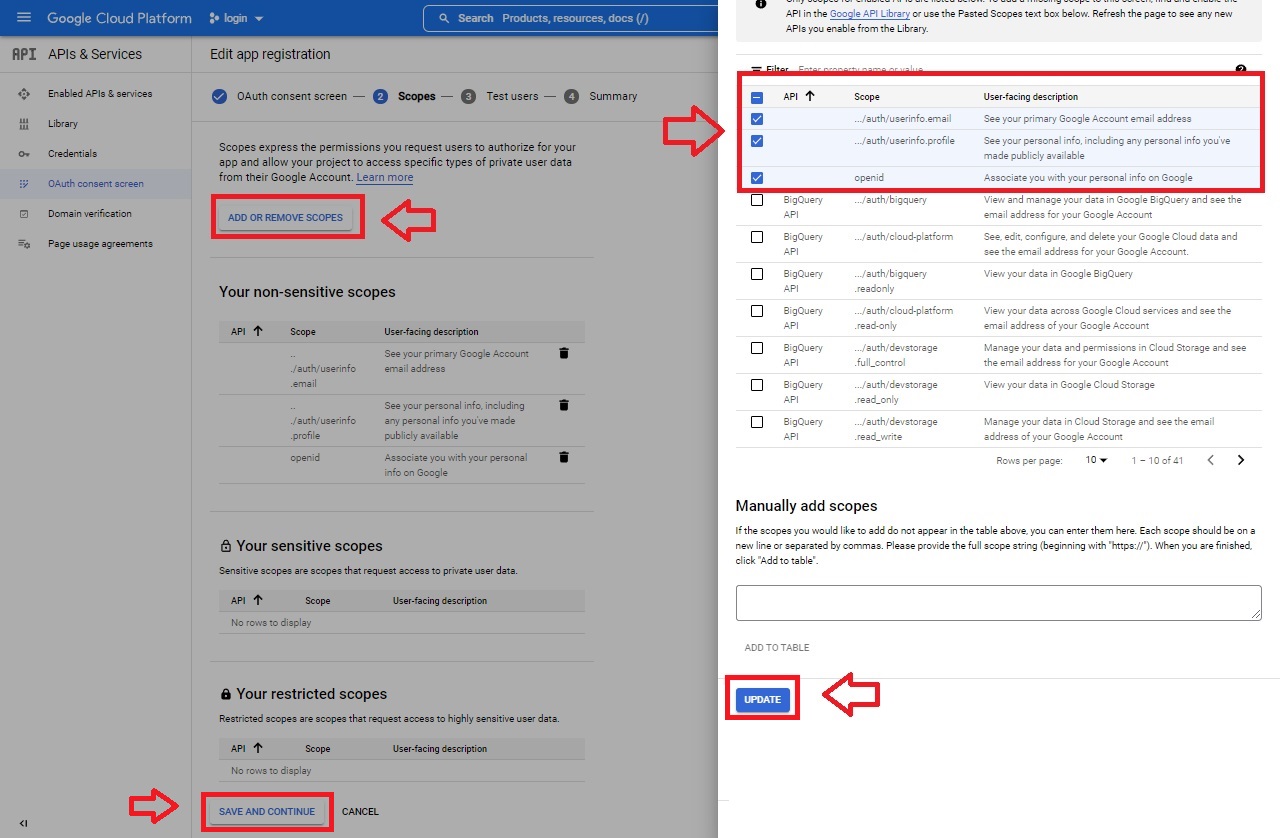
Step 4: You’re now on Scopes, the second step while registering the app. Click on "Add or Remove Scopes", then on the right side window select these 3:
…/auth/userinfo.email
…/auth/userinfo.profile
openid
Click on "Update", and then on "Save and Continue"
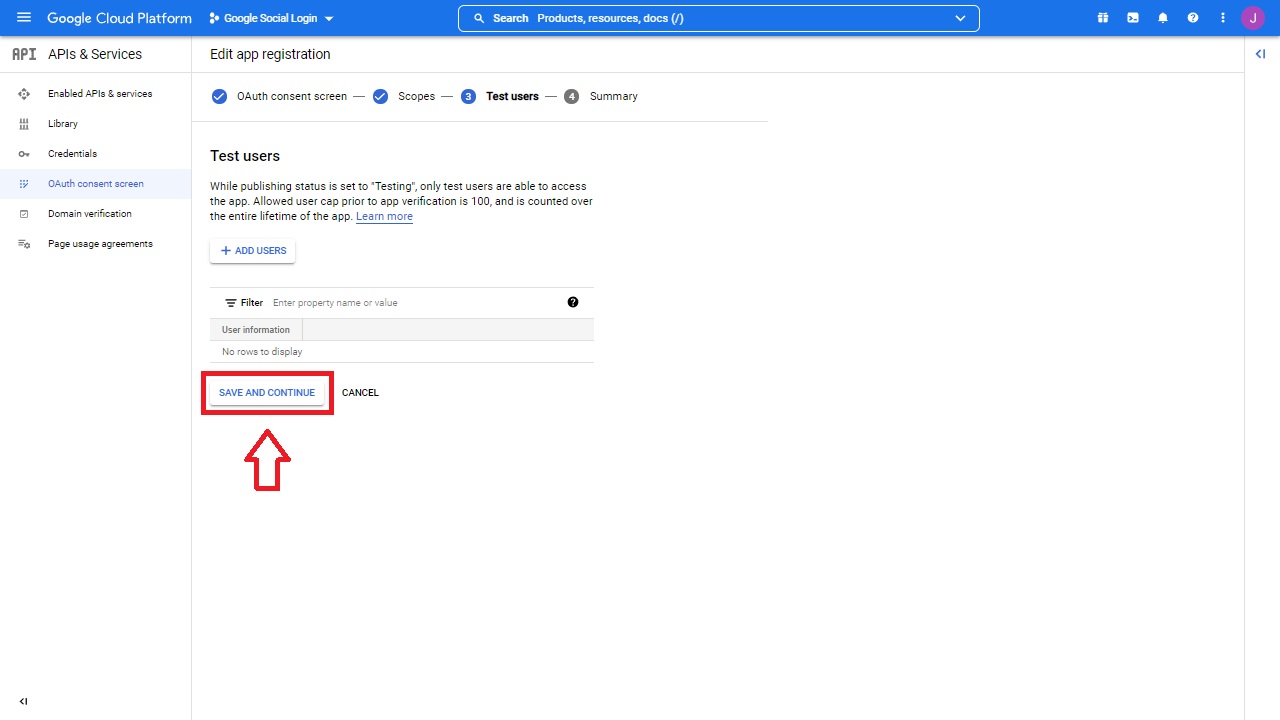
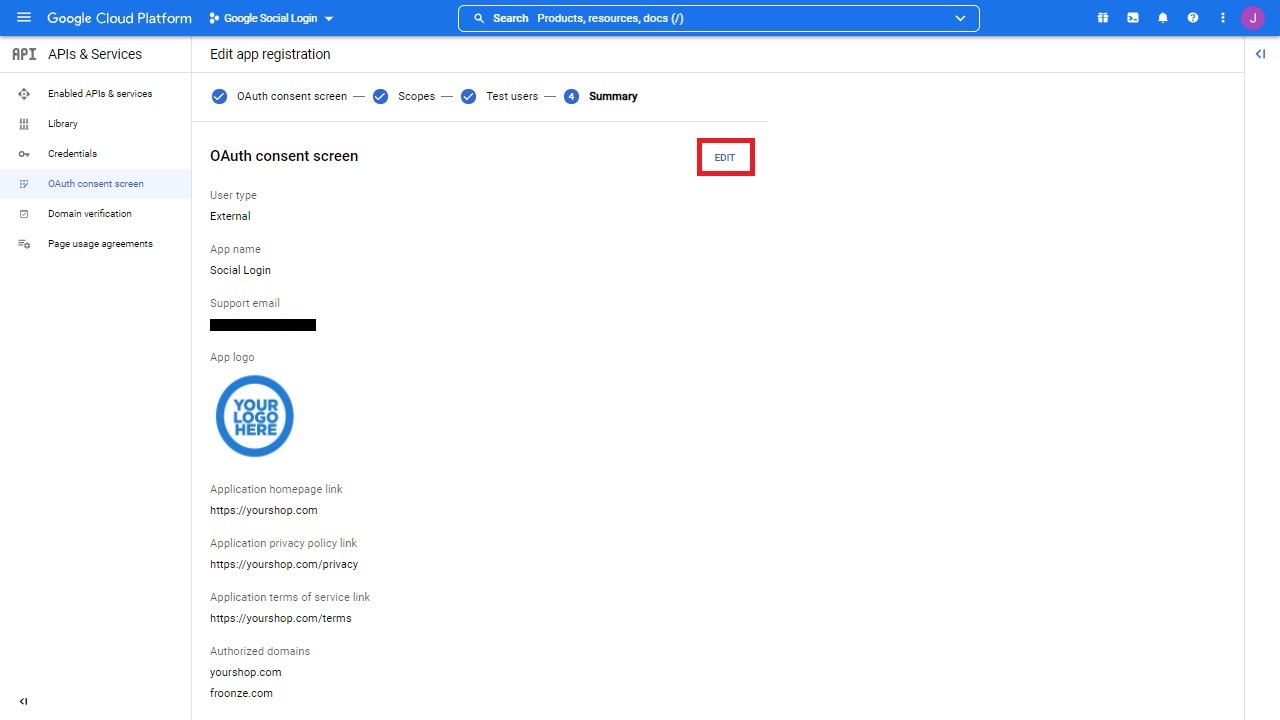
Step 5: Next panel is "Test Users", you can just "Save and Continue". In the last panel "Summary" you can review and Edit the app registration only if needed
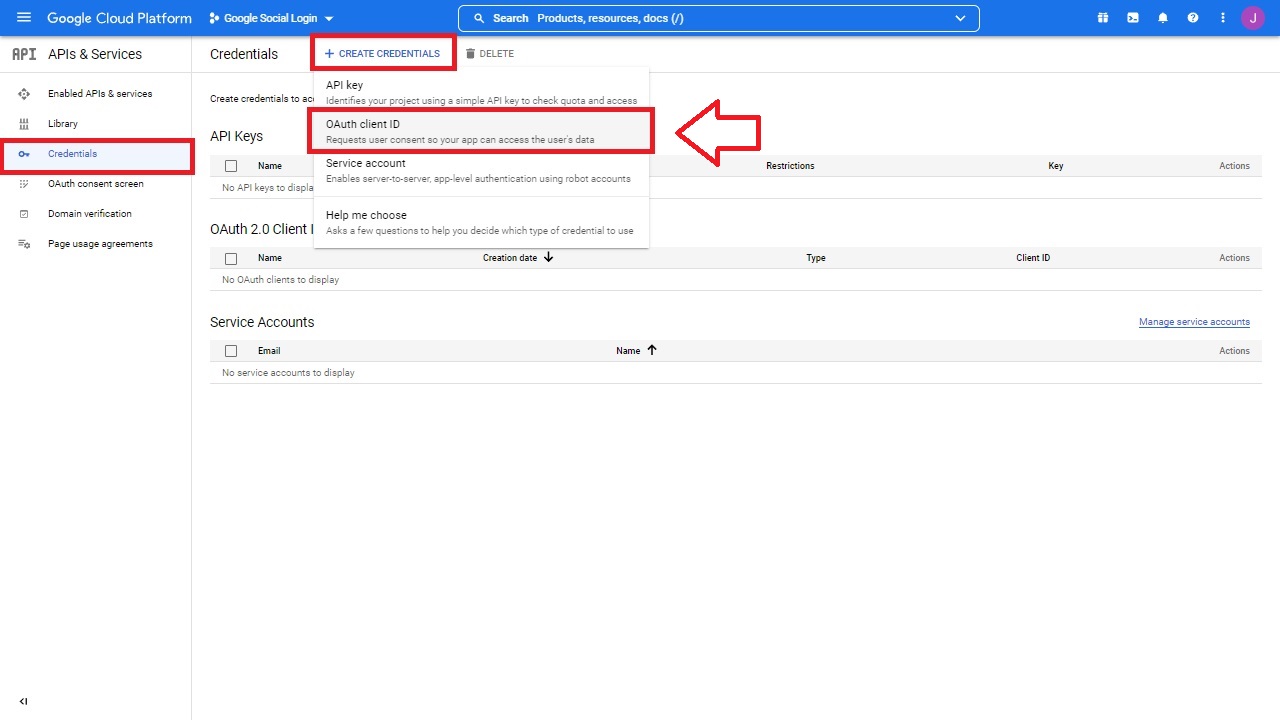
Step 6: Navigate to Credentials on the left bar, then click on "Create Credentials" on top and select "OAuth client ID"
Select "Web application" as application type and optionally give it a name.
For Authorized JavaScript Origins, click on "Add URL" and add your site's domain (custom domain if you have one, otherwise your myshopify domain)
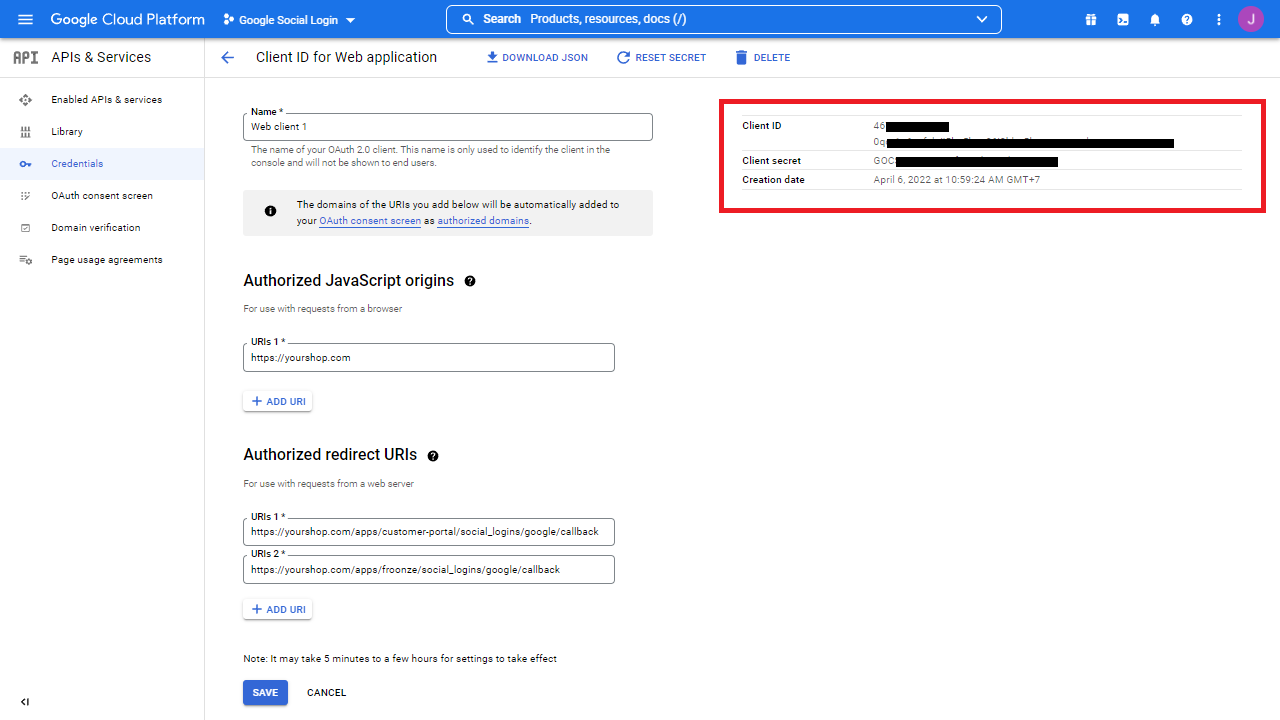
For Authorized redirect URLs click on "Add URL" two consecutive times and add these 2 URLs (replace yourshop.com with your domain):
- https://yourshop.com/apps/customer-portal/social_logins/google/callback
- https://yourshop.com/apps/froonze/social_logins/google/callback
Finally, click on "Create"
Note: if you changed the app proxy you also need to modify the redirect URL to match the new proxy address.E.g. for a new proxy yourshop.com/tools/portal, the redirect URL will be https://yourshop.com/tools/portal/social_logins/google/callback

Step 7: After creating the credentials a pop-up will show up with both the Client ID and the Client Secret, copy these values
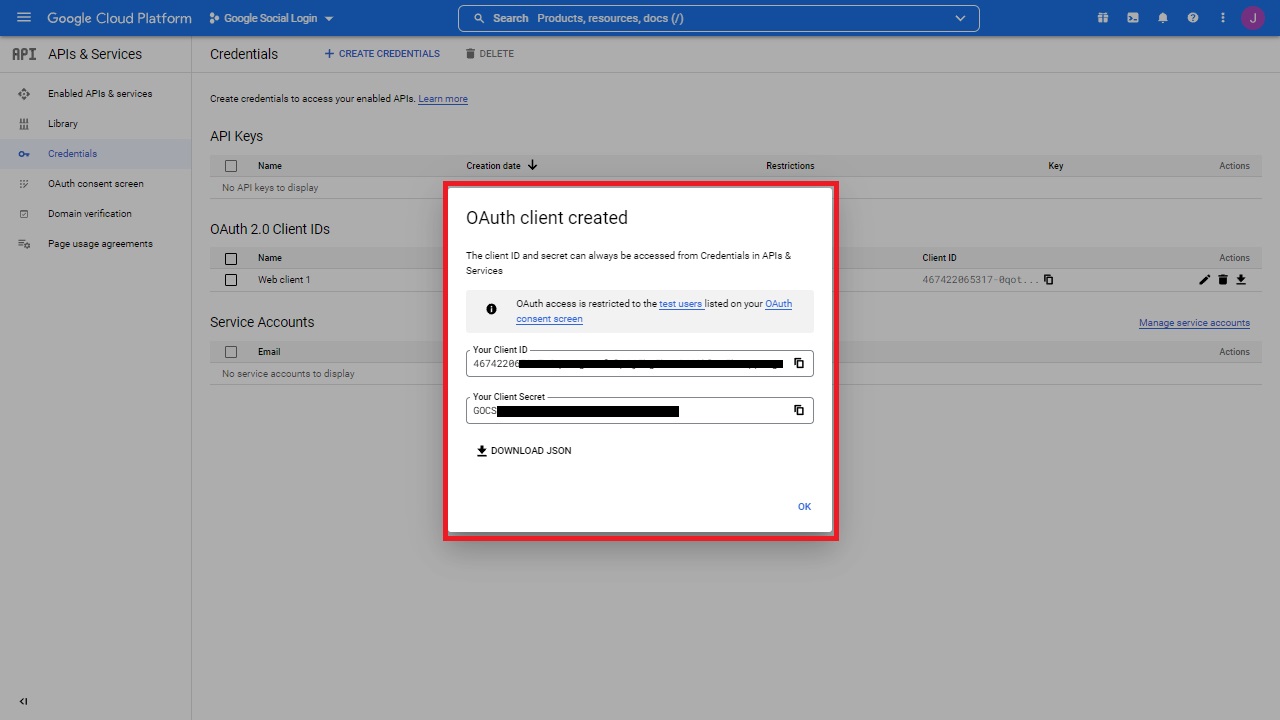
If you miss these, you can still find the keys in Credentials > OAuth 2.0 Client IDs > Web Client
Step 8: Go back to OAuth consent screen. Click on Publish App under Publishing Status and Confirm. If you didn't upload a logo the prompt should inform you that "You do not need to submit your app for verification". Still Google will need to review the app for it to fully work, so it may take a couple of days.
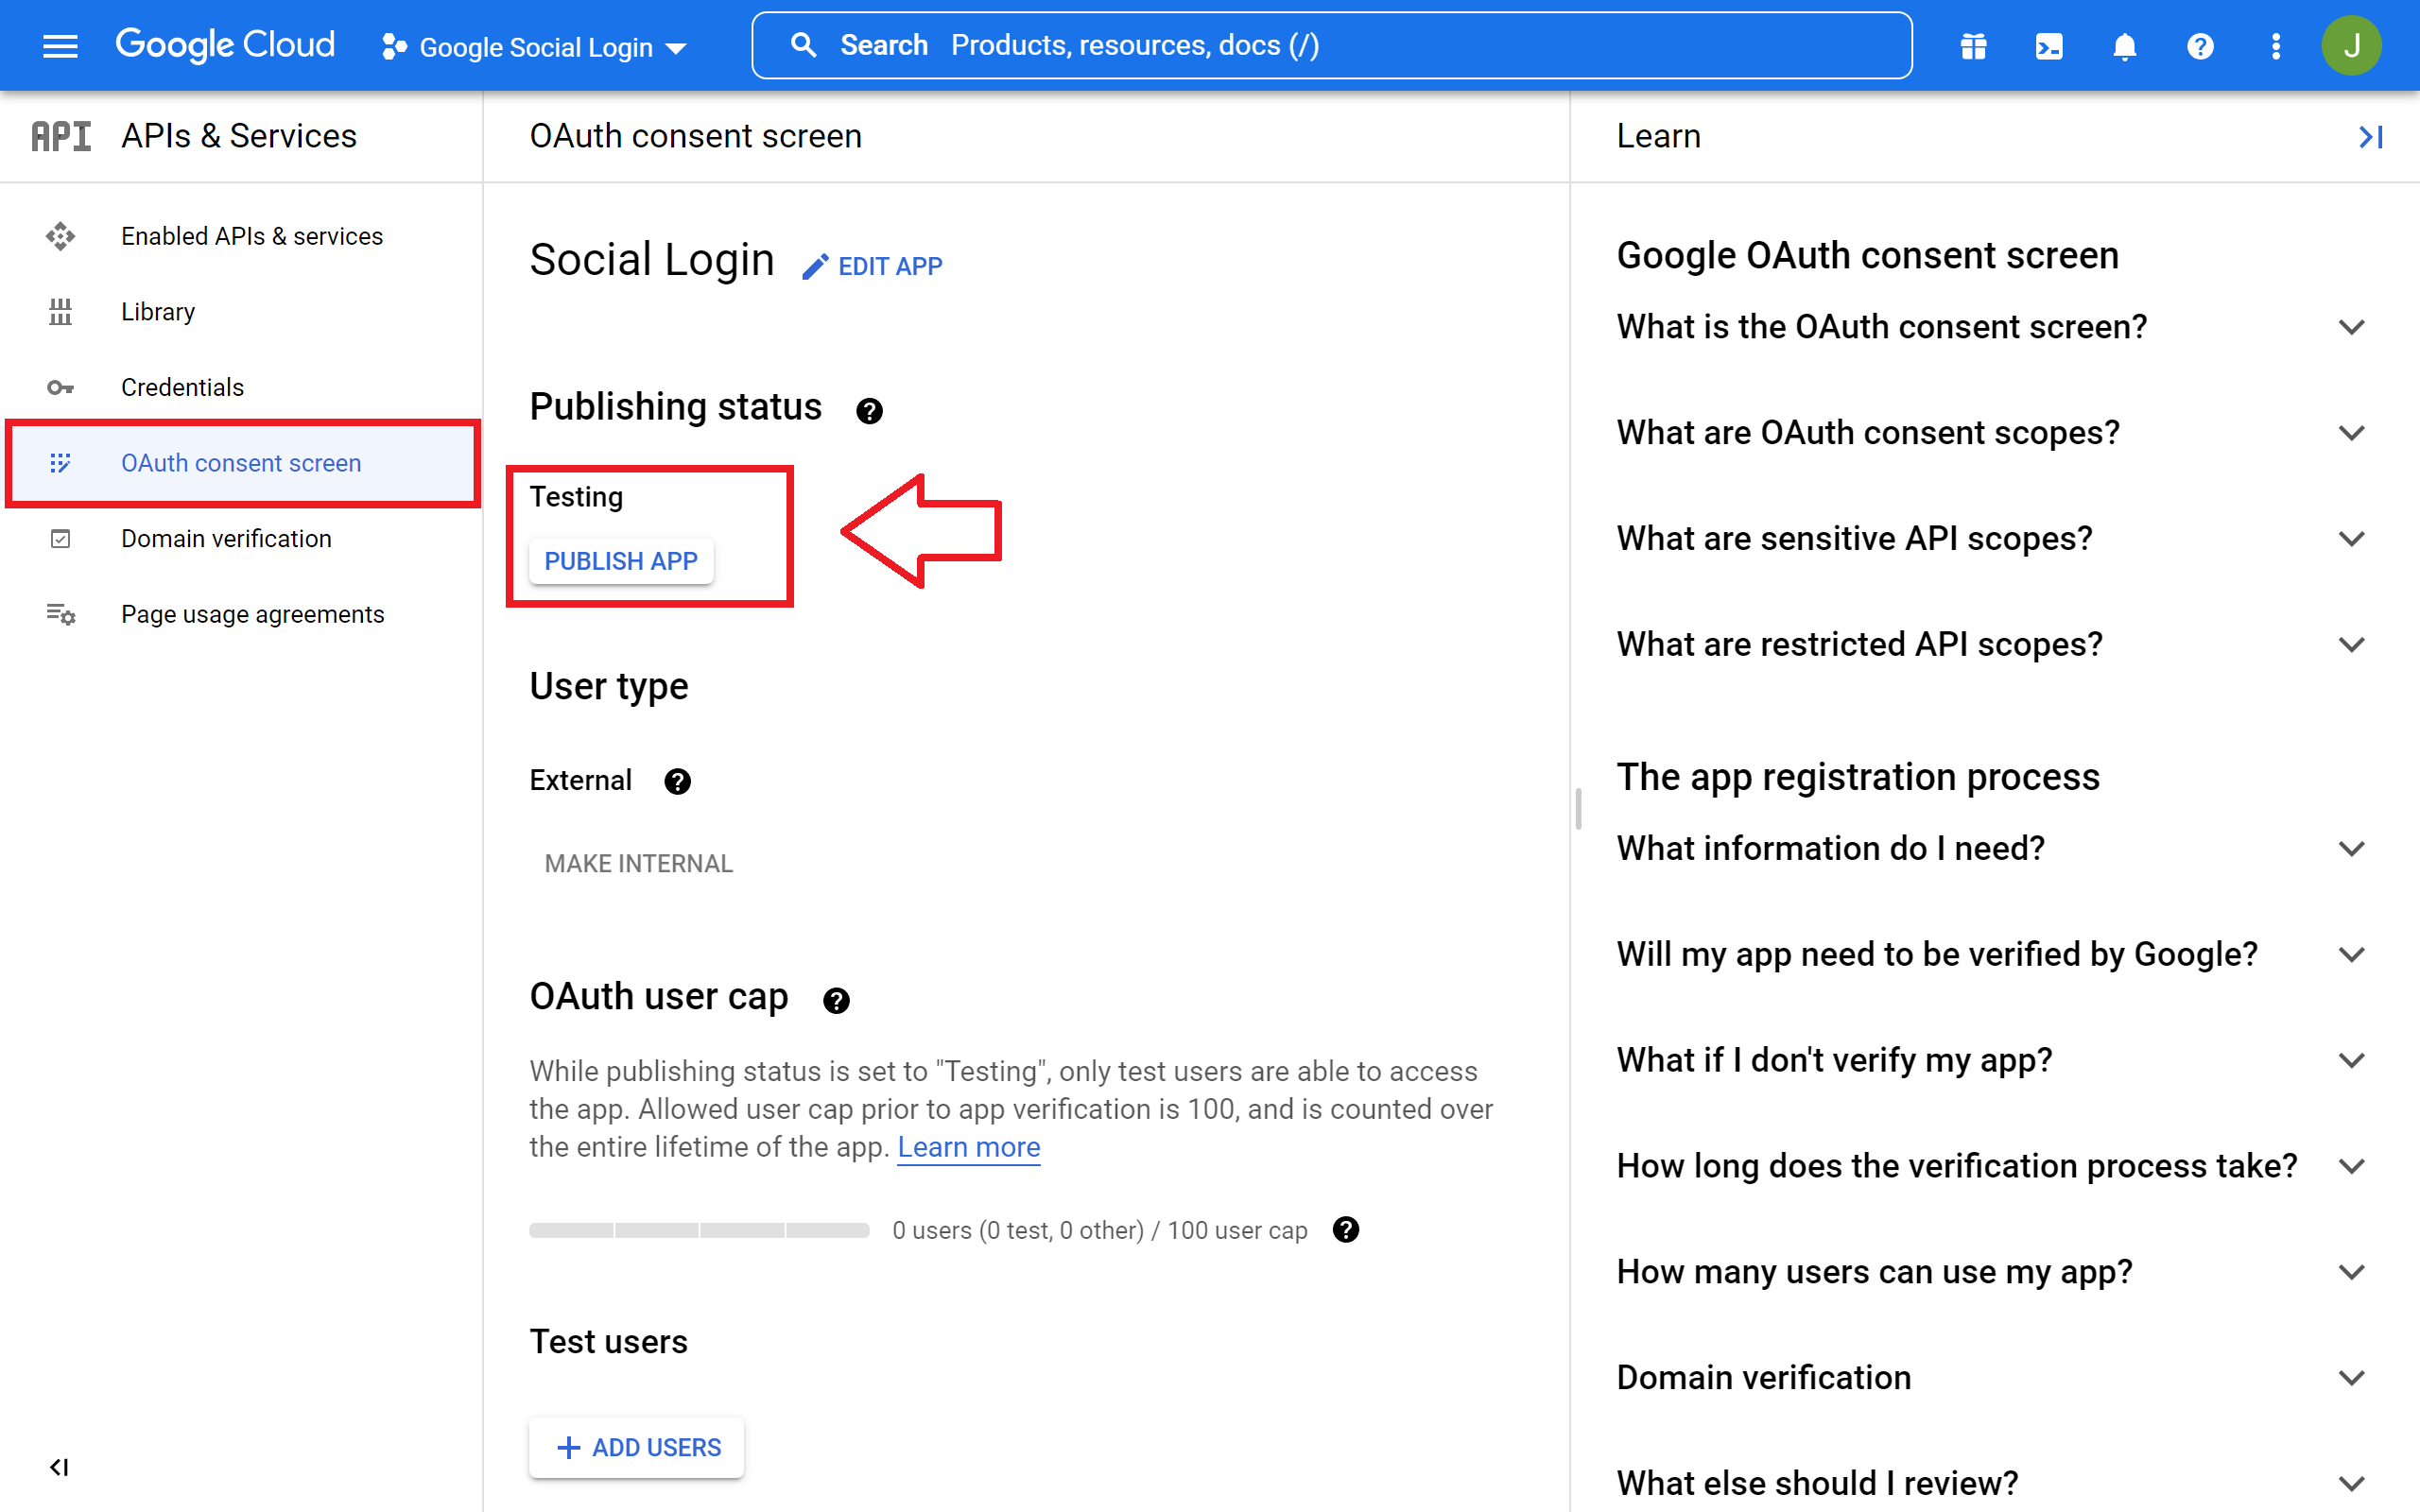

If you uploaded a logo, then publishing the app will require to follow the verification process stated by Google, which at present can include points such as sending a written explanation, a Youtube video, an updated link to your Privacy Policy and the verification of your domains. Once verified, you can Publish the app.

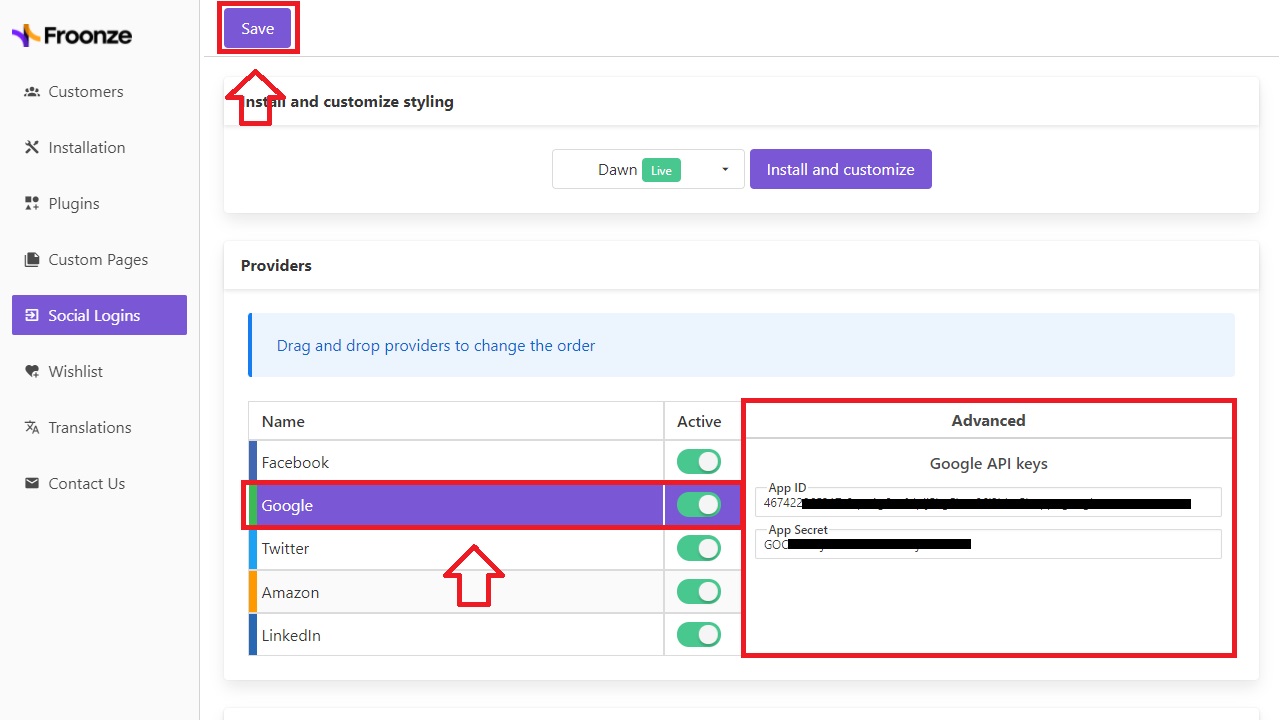
Step 9: To finish setting up the app, copy the two values we mentioned in Step 7 (Client ID and Client Secret) in our Social Login Advanced Settings and click on "Save"