Installing Custom Forms

Froonze
Last Update hace 3 años
Our Registration and Profile forms are installed automatically with the installation toggle you can see in our settings, while Page forms will need you to add the form code-snippet provided in our settings in the HTML code of the destination page.
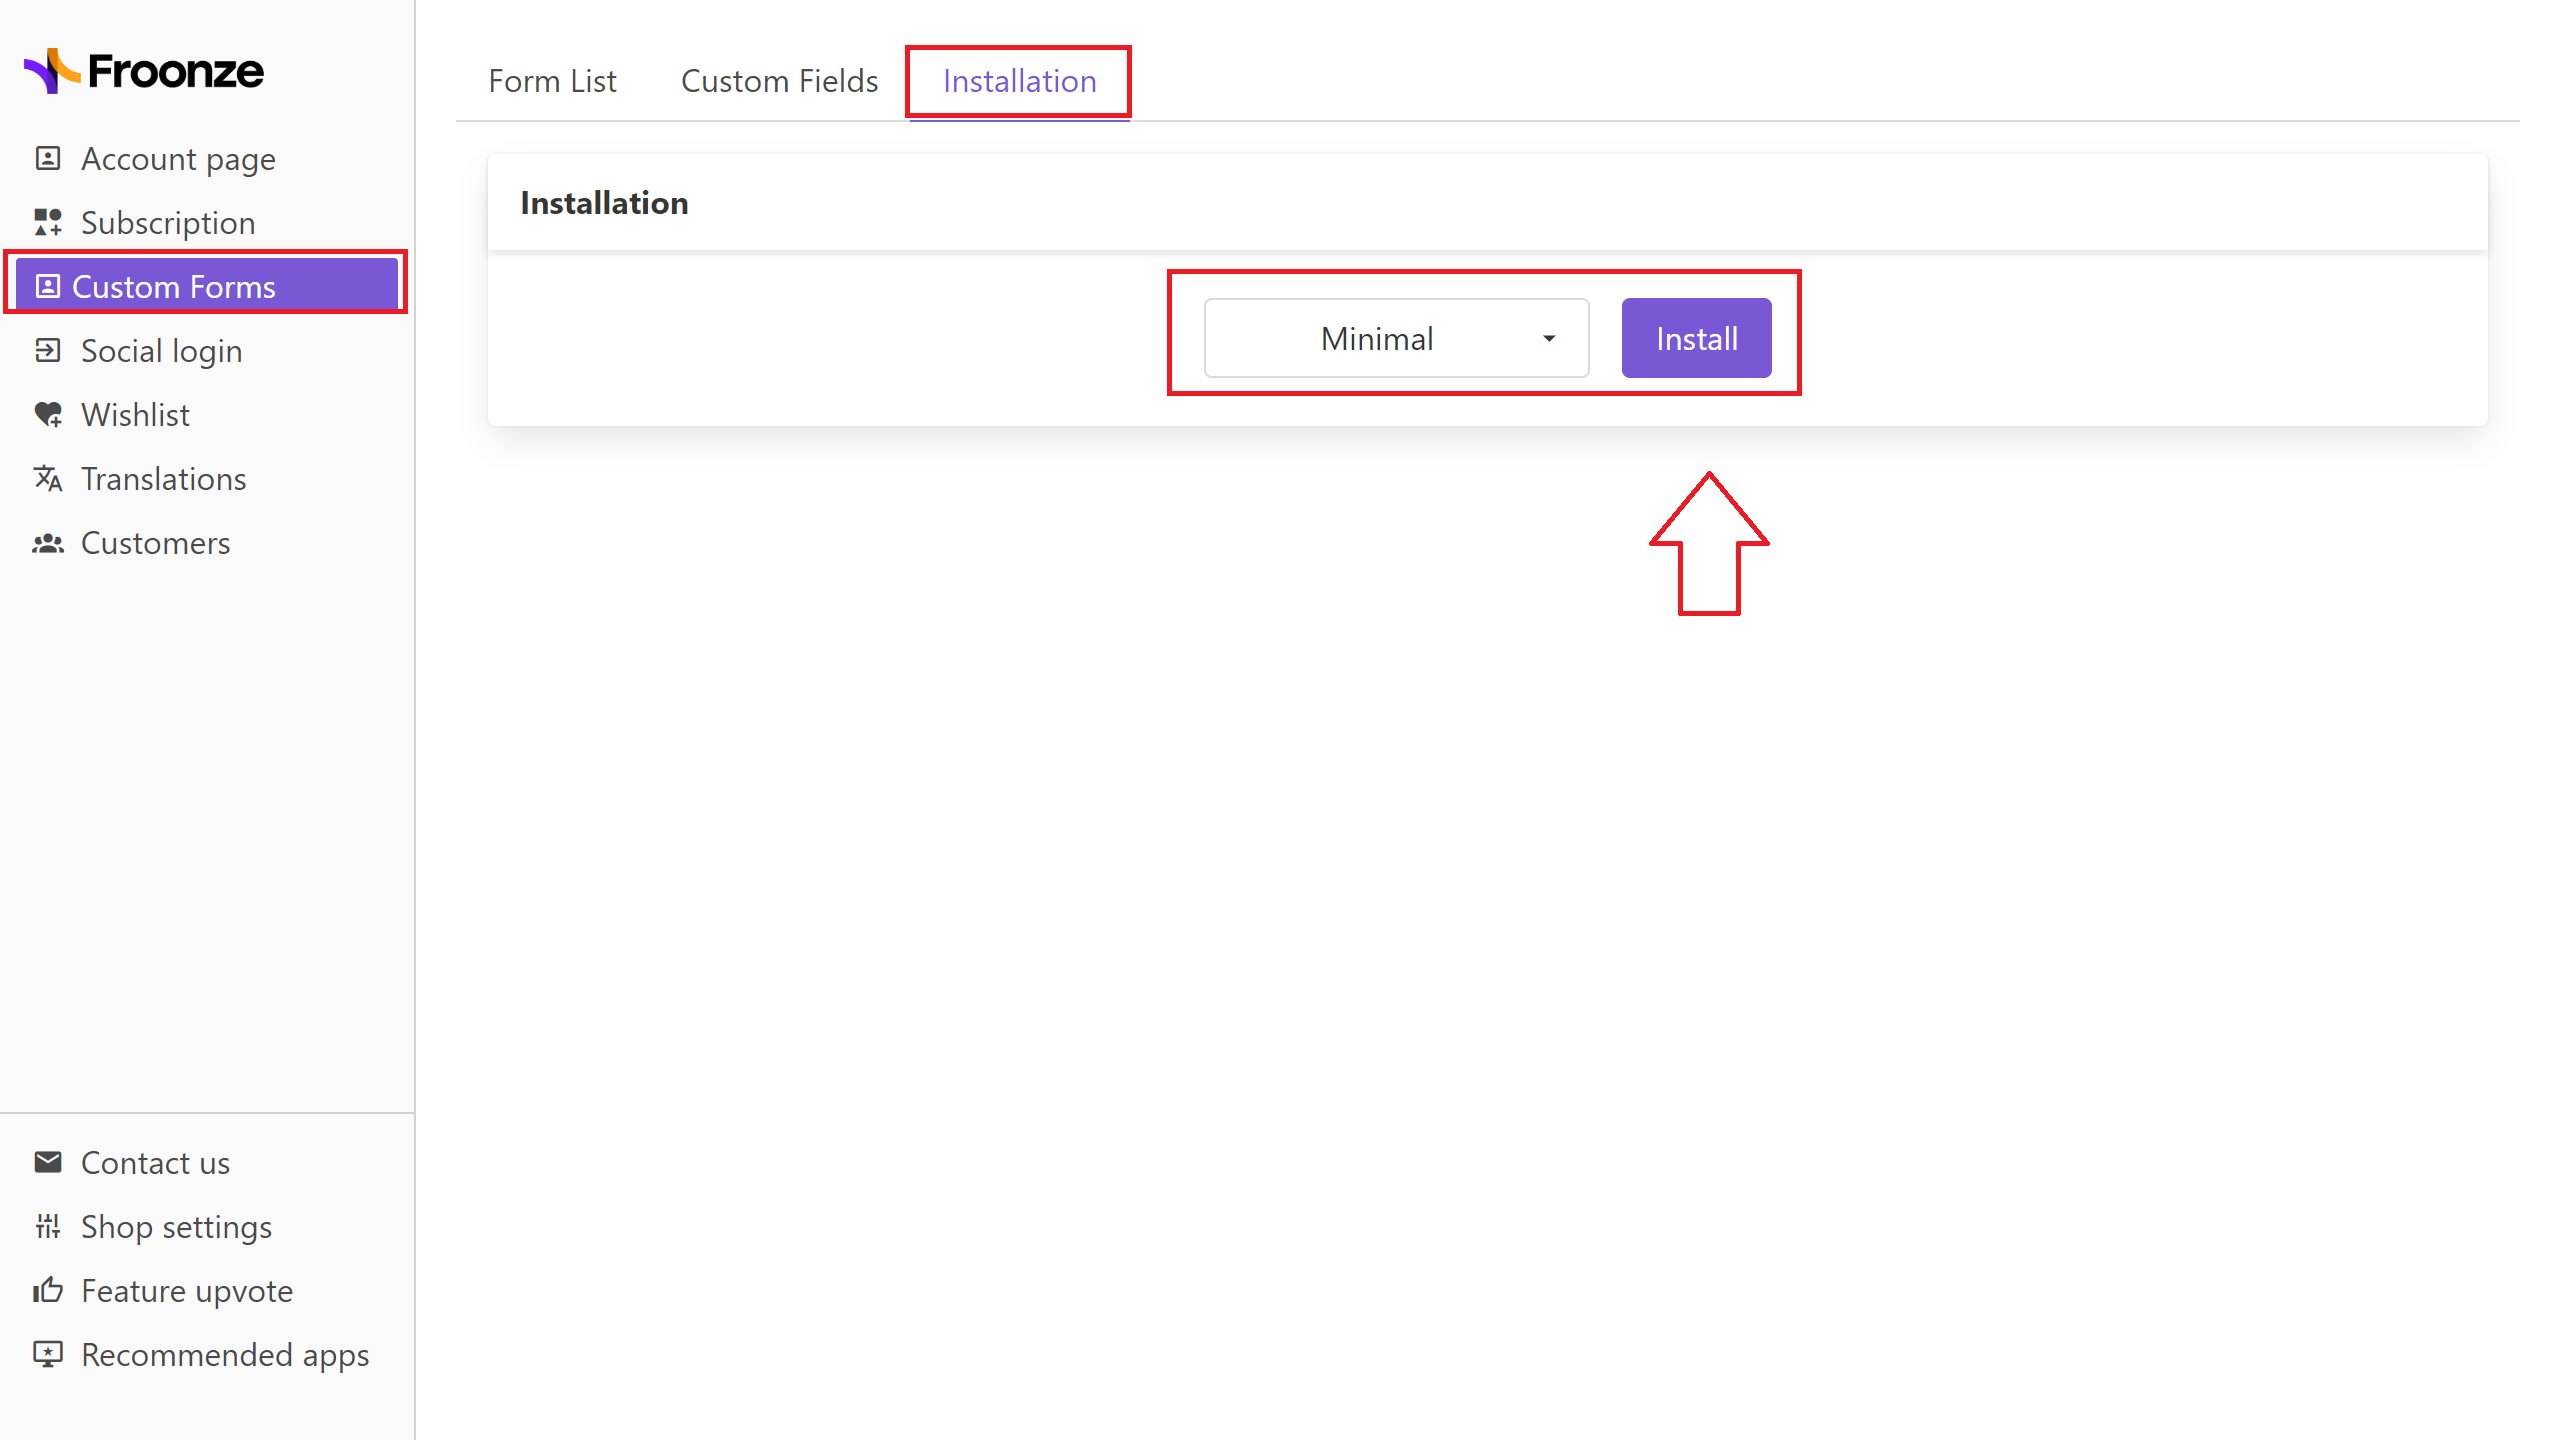
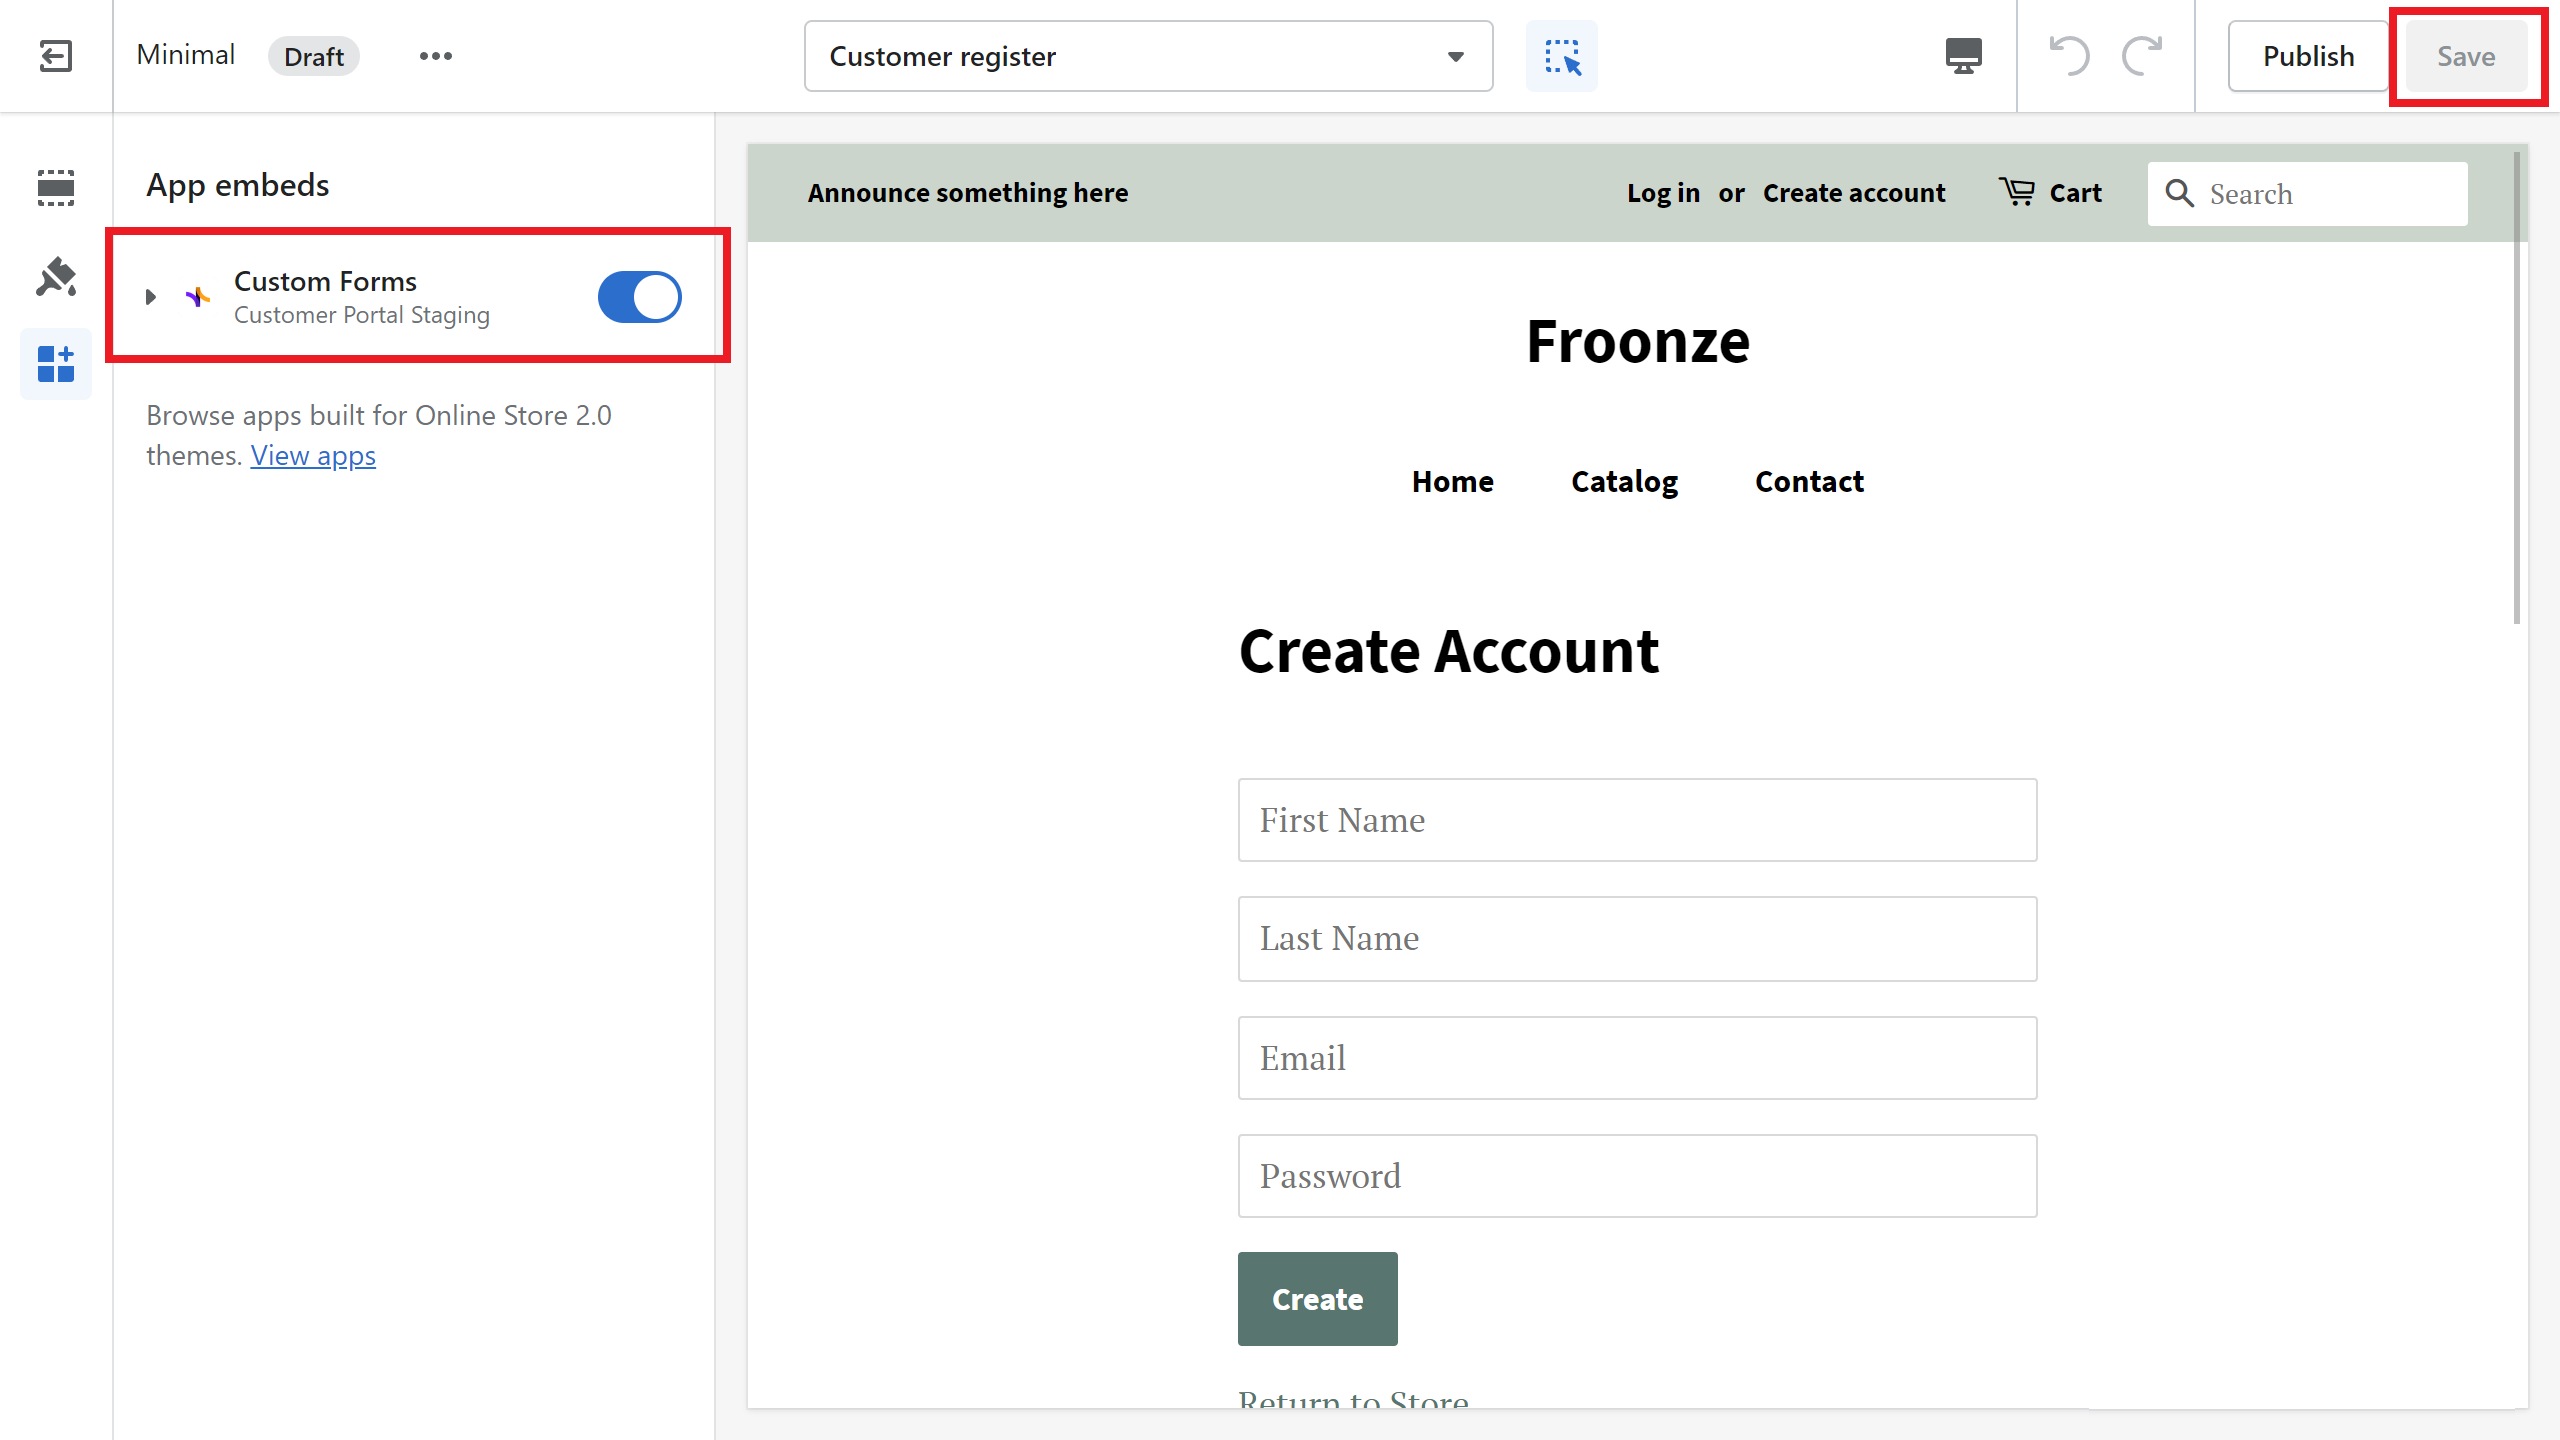
But before you go ahead with any of these options you need to make sure that the Custom Form app embed is already enabled in the theme where you want to replace or add the forms. To do so just go to our Settings > Custom Forms > Installation, select the theme in the theme dropdown and click on Install. Then on the Shopify Editor just make sure the app embed is enabled and the settings are Saved.
Back in our Settings > Custom Forms > Form List you can go ahead and activate both the Registration form and the Profile forms that you want to be automatically installed on the respective registration page and profile panel (on the account page), and only this will replace the native forms that were installed there before. Please remember there can only be one active form of each, since each type will be installed in a singular destination with one only form.
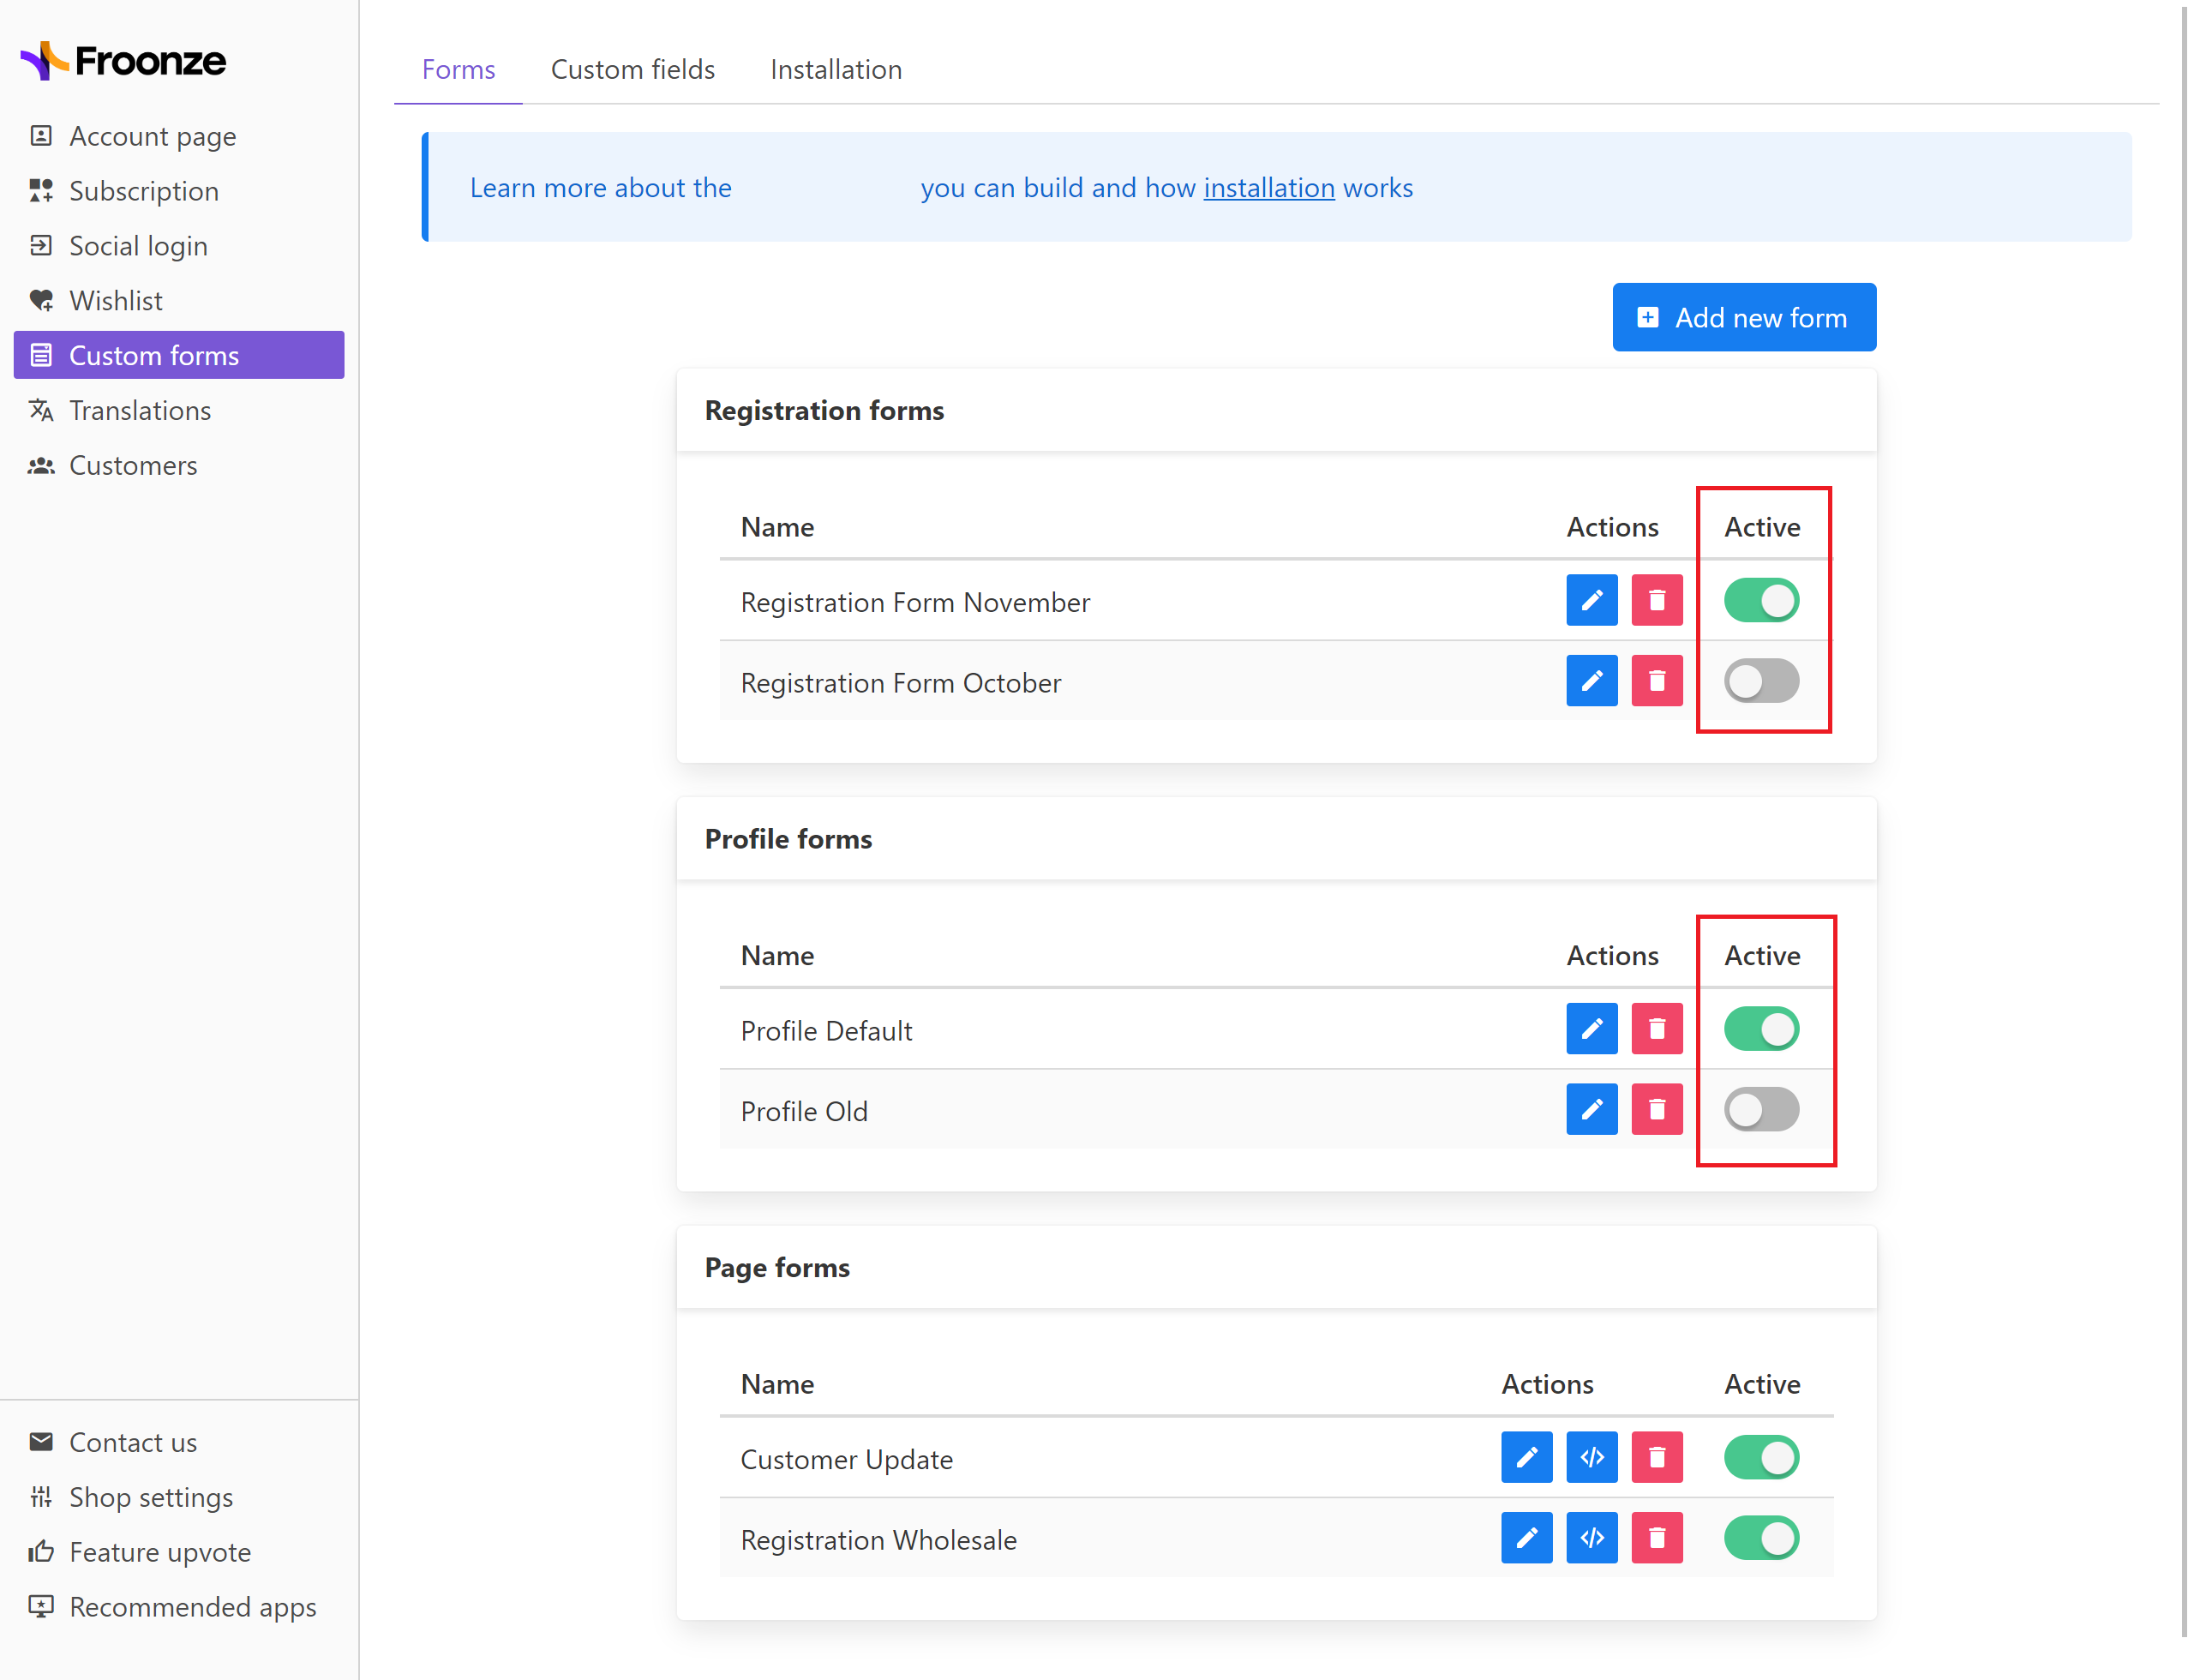
To install Page Forms, copy the form-snippet first with the Copy button you can see in the list. Activate its toggle as well, you can activate different Page Forms at the same time up to the limit of your plan.
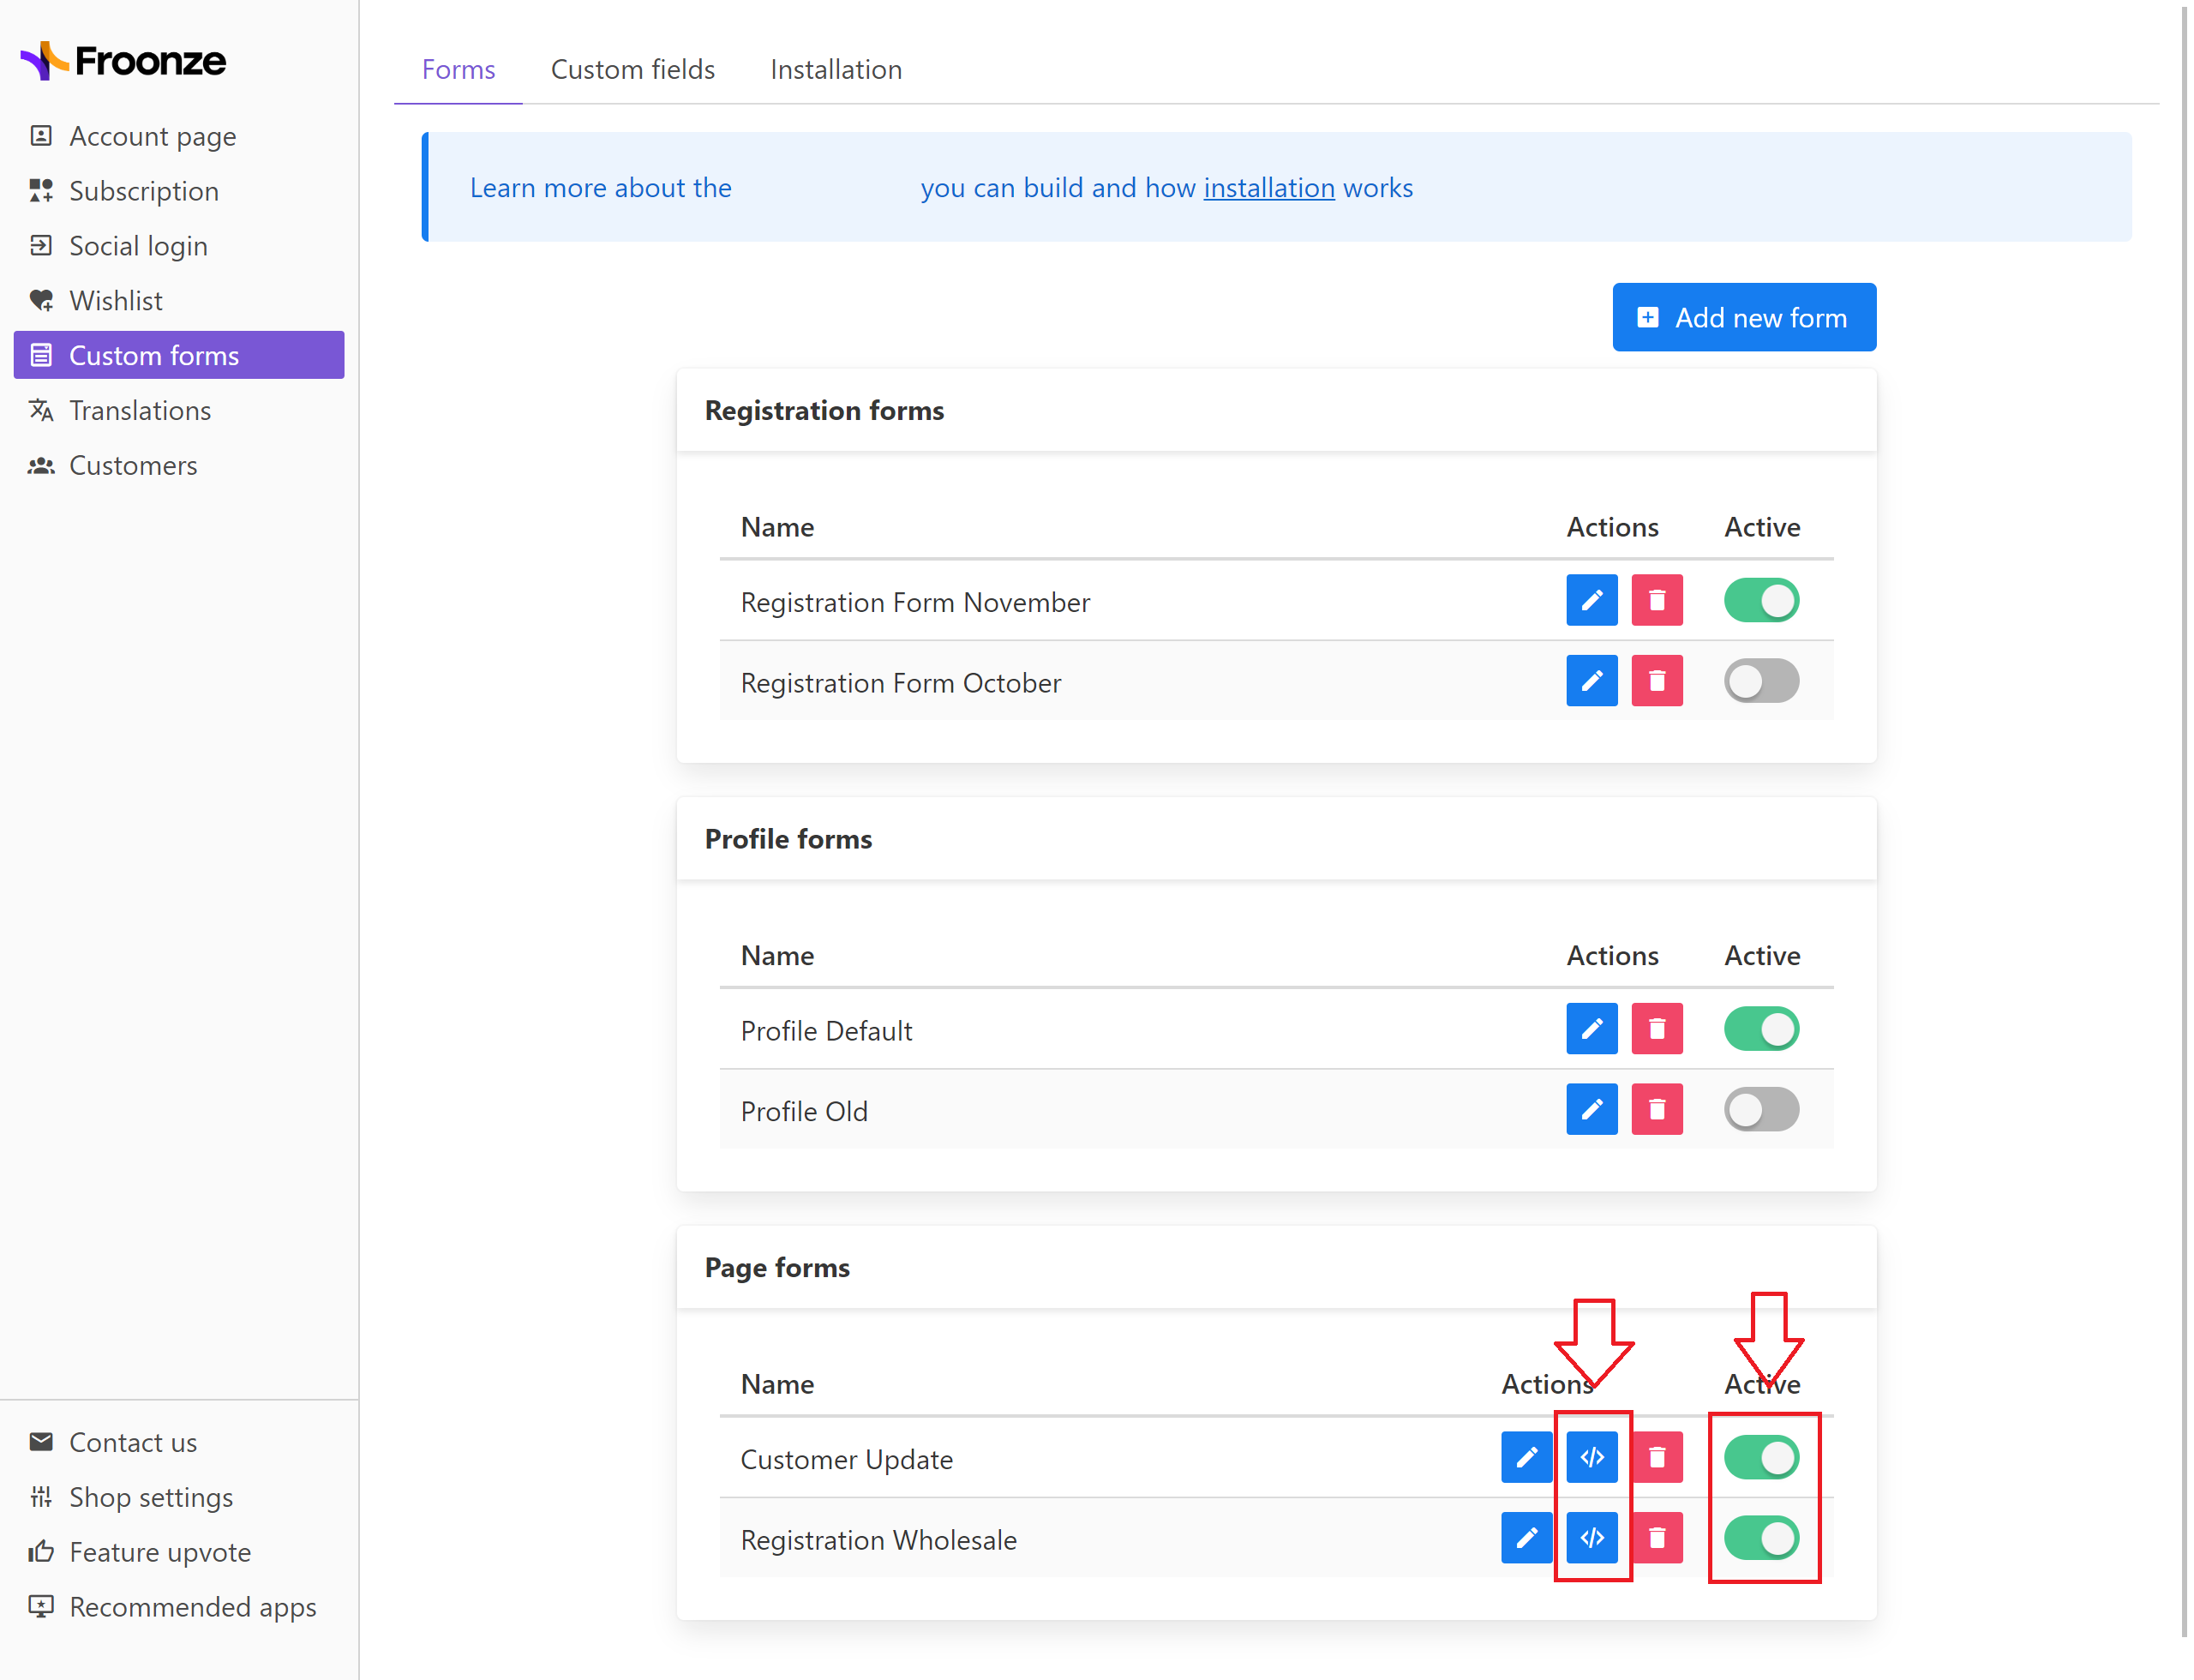
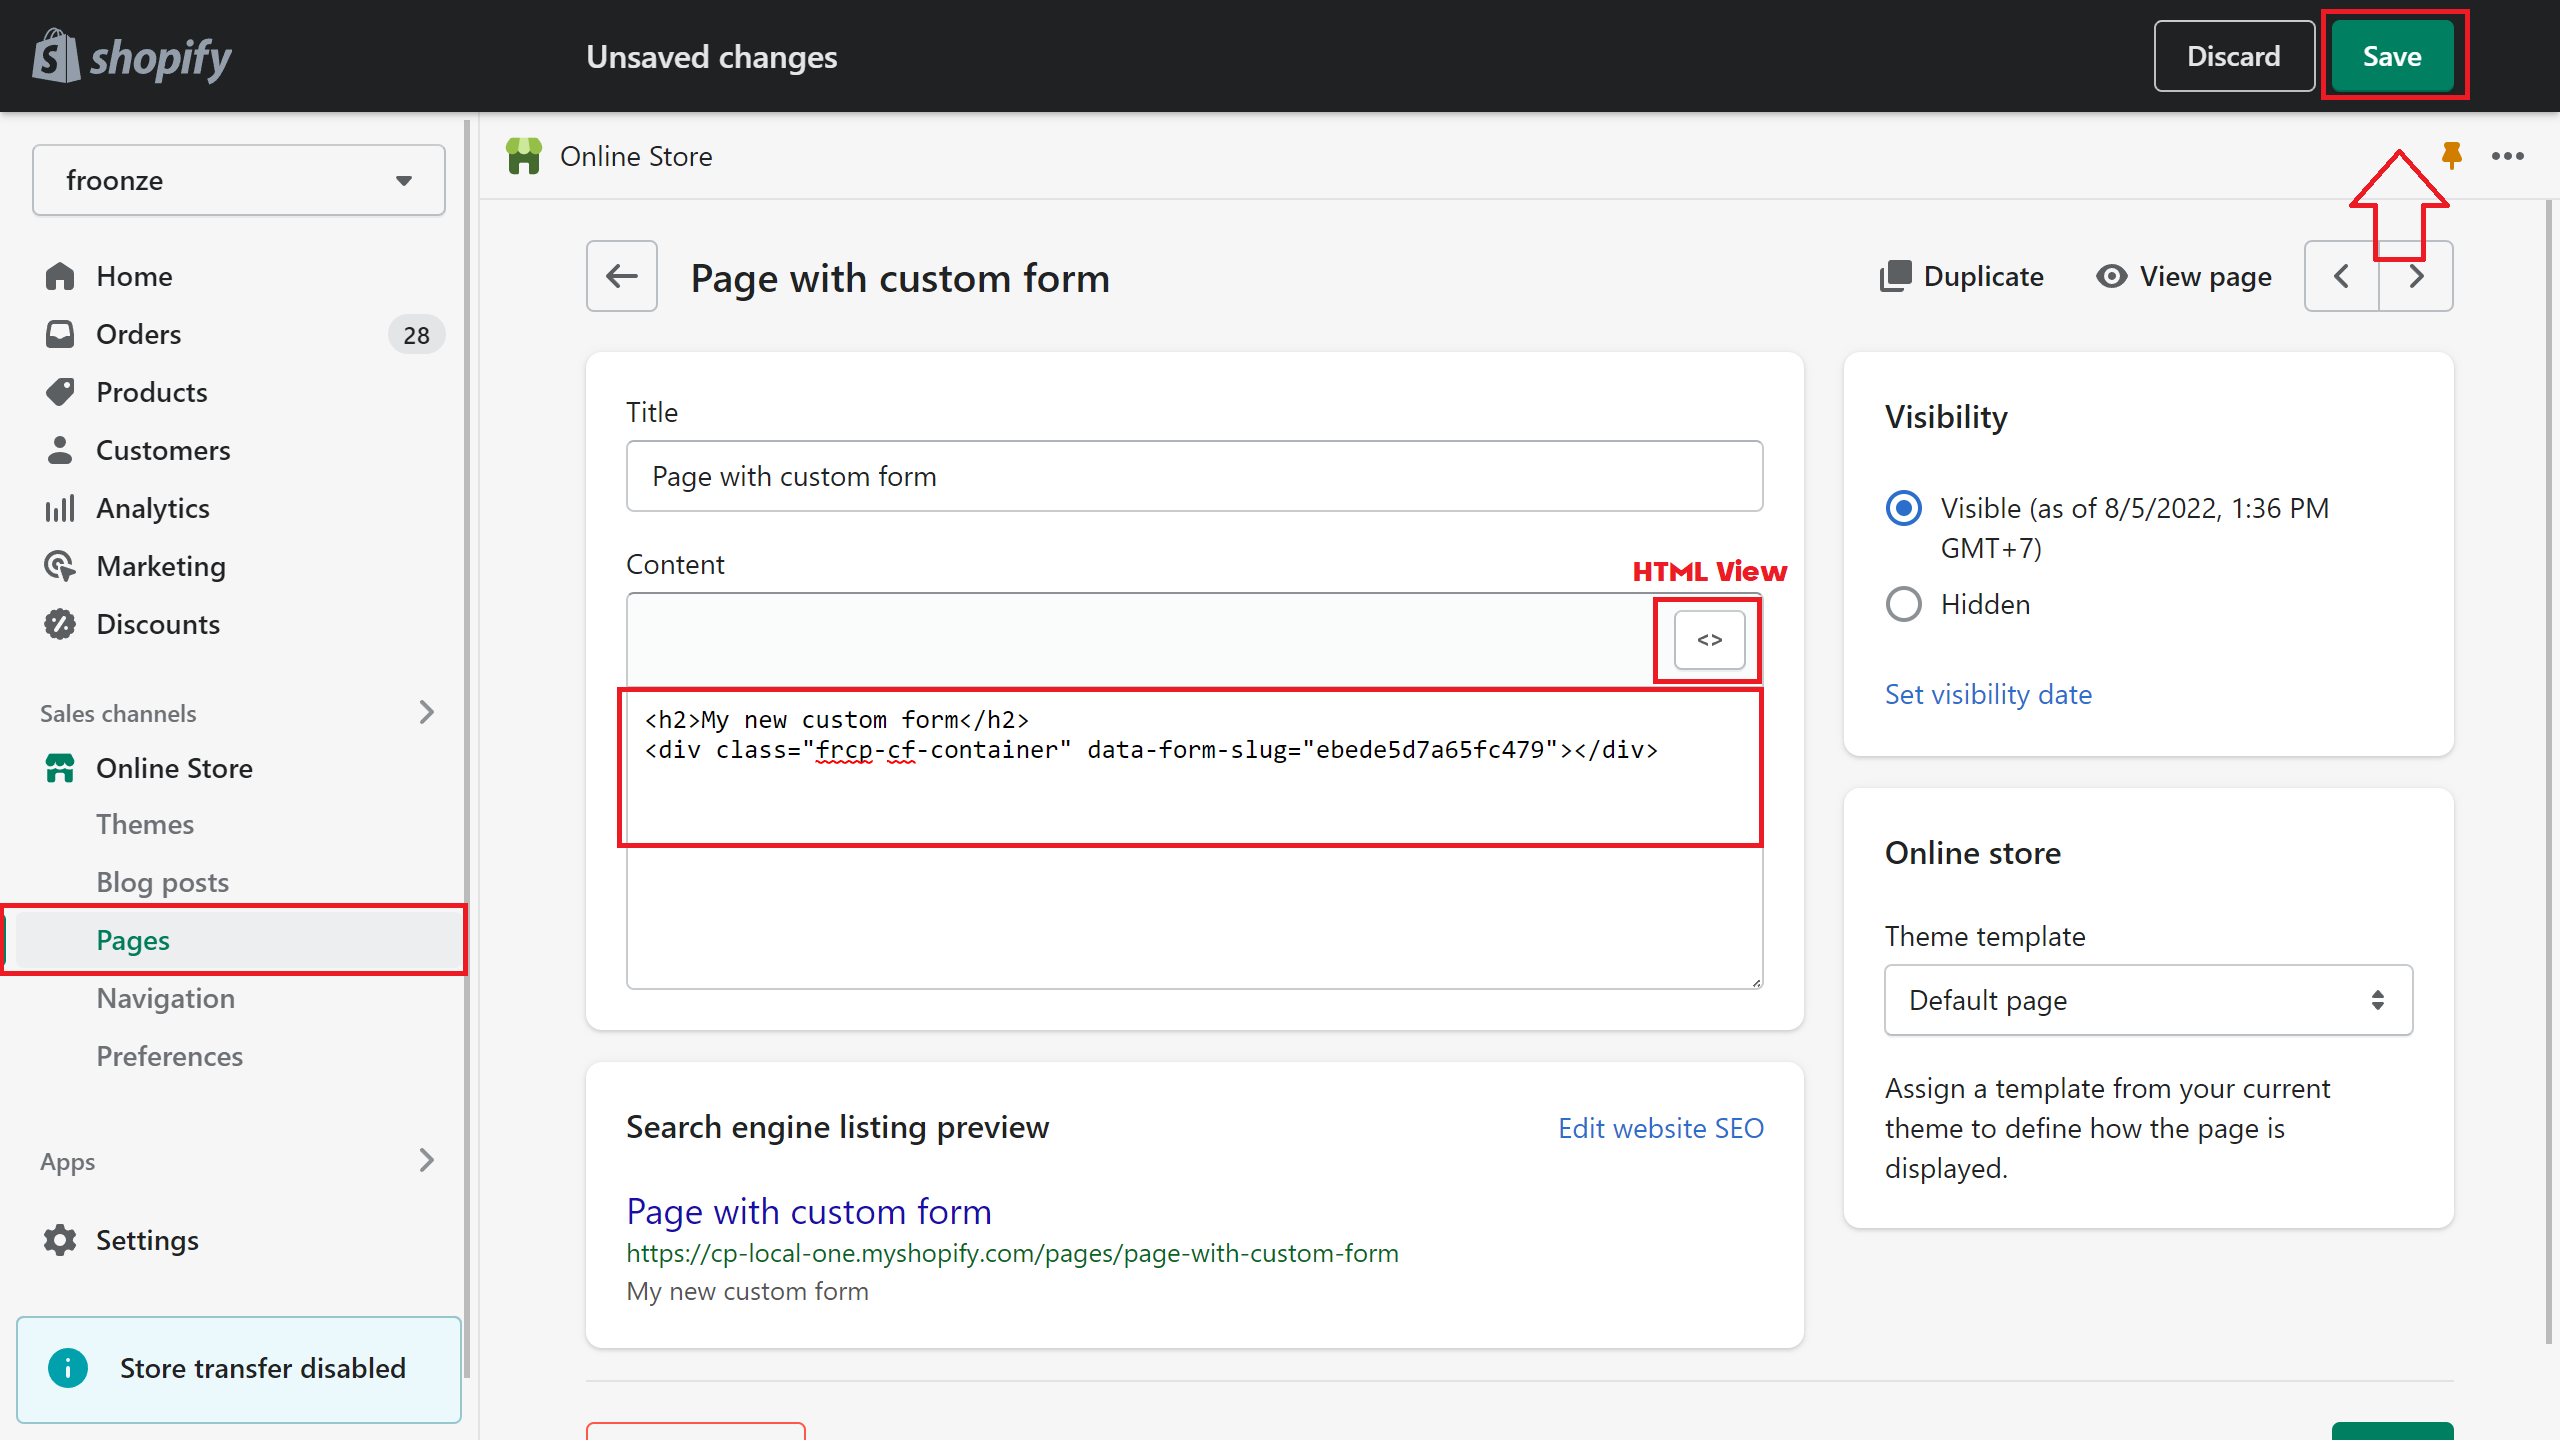
Next go to your Shopify Admin > Online Store > Pages, click on Add Page and choose a name for it in the box on top. Then click on the Show HTML icon to open the HTML editor. Paste the HTML snippet there along with any other element or content around that you want the page to contain, and Save the page.
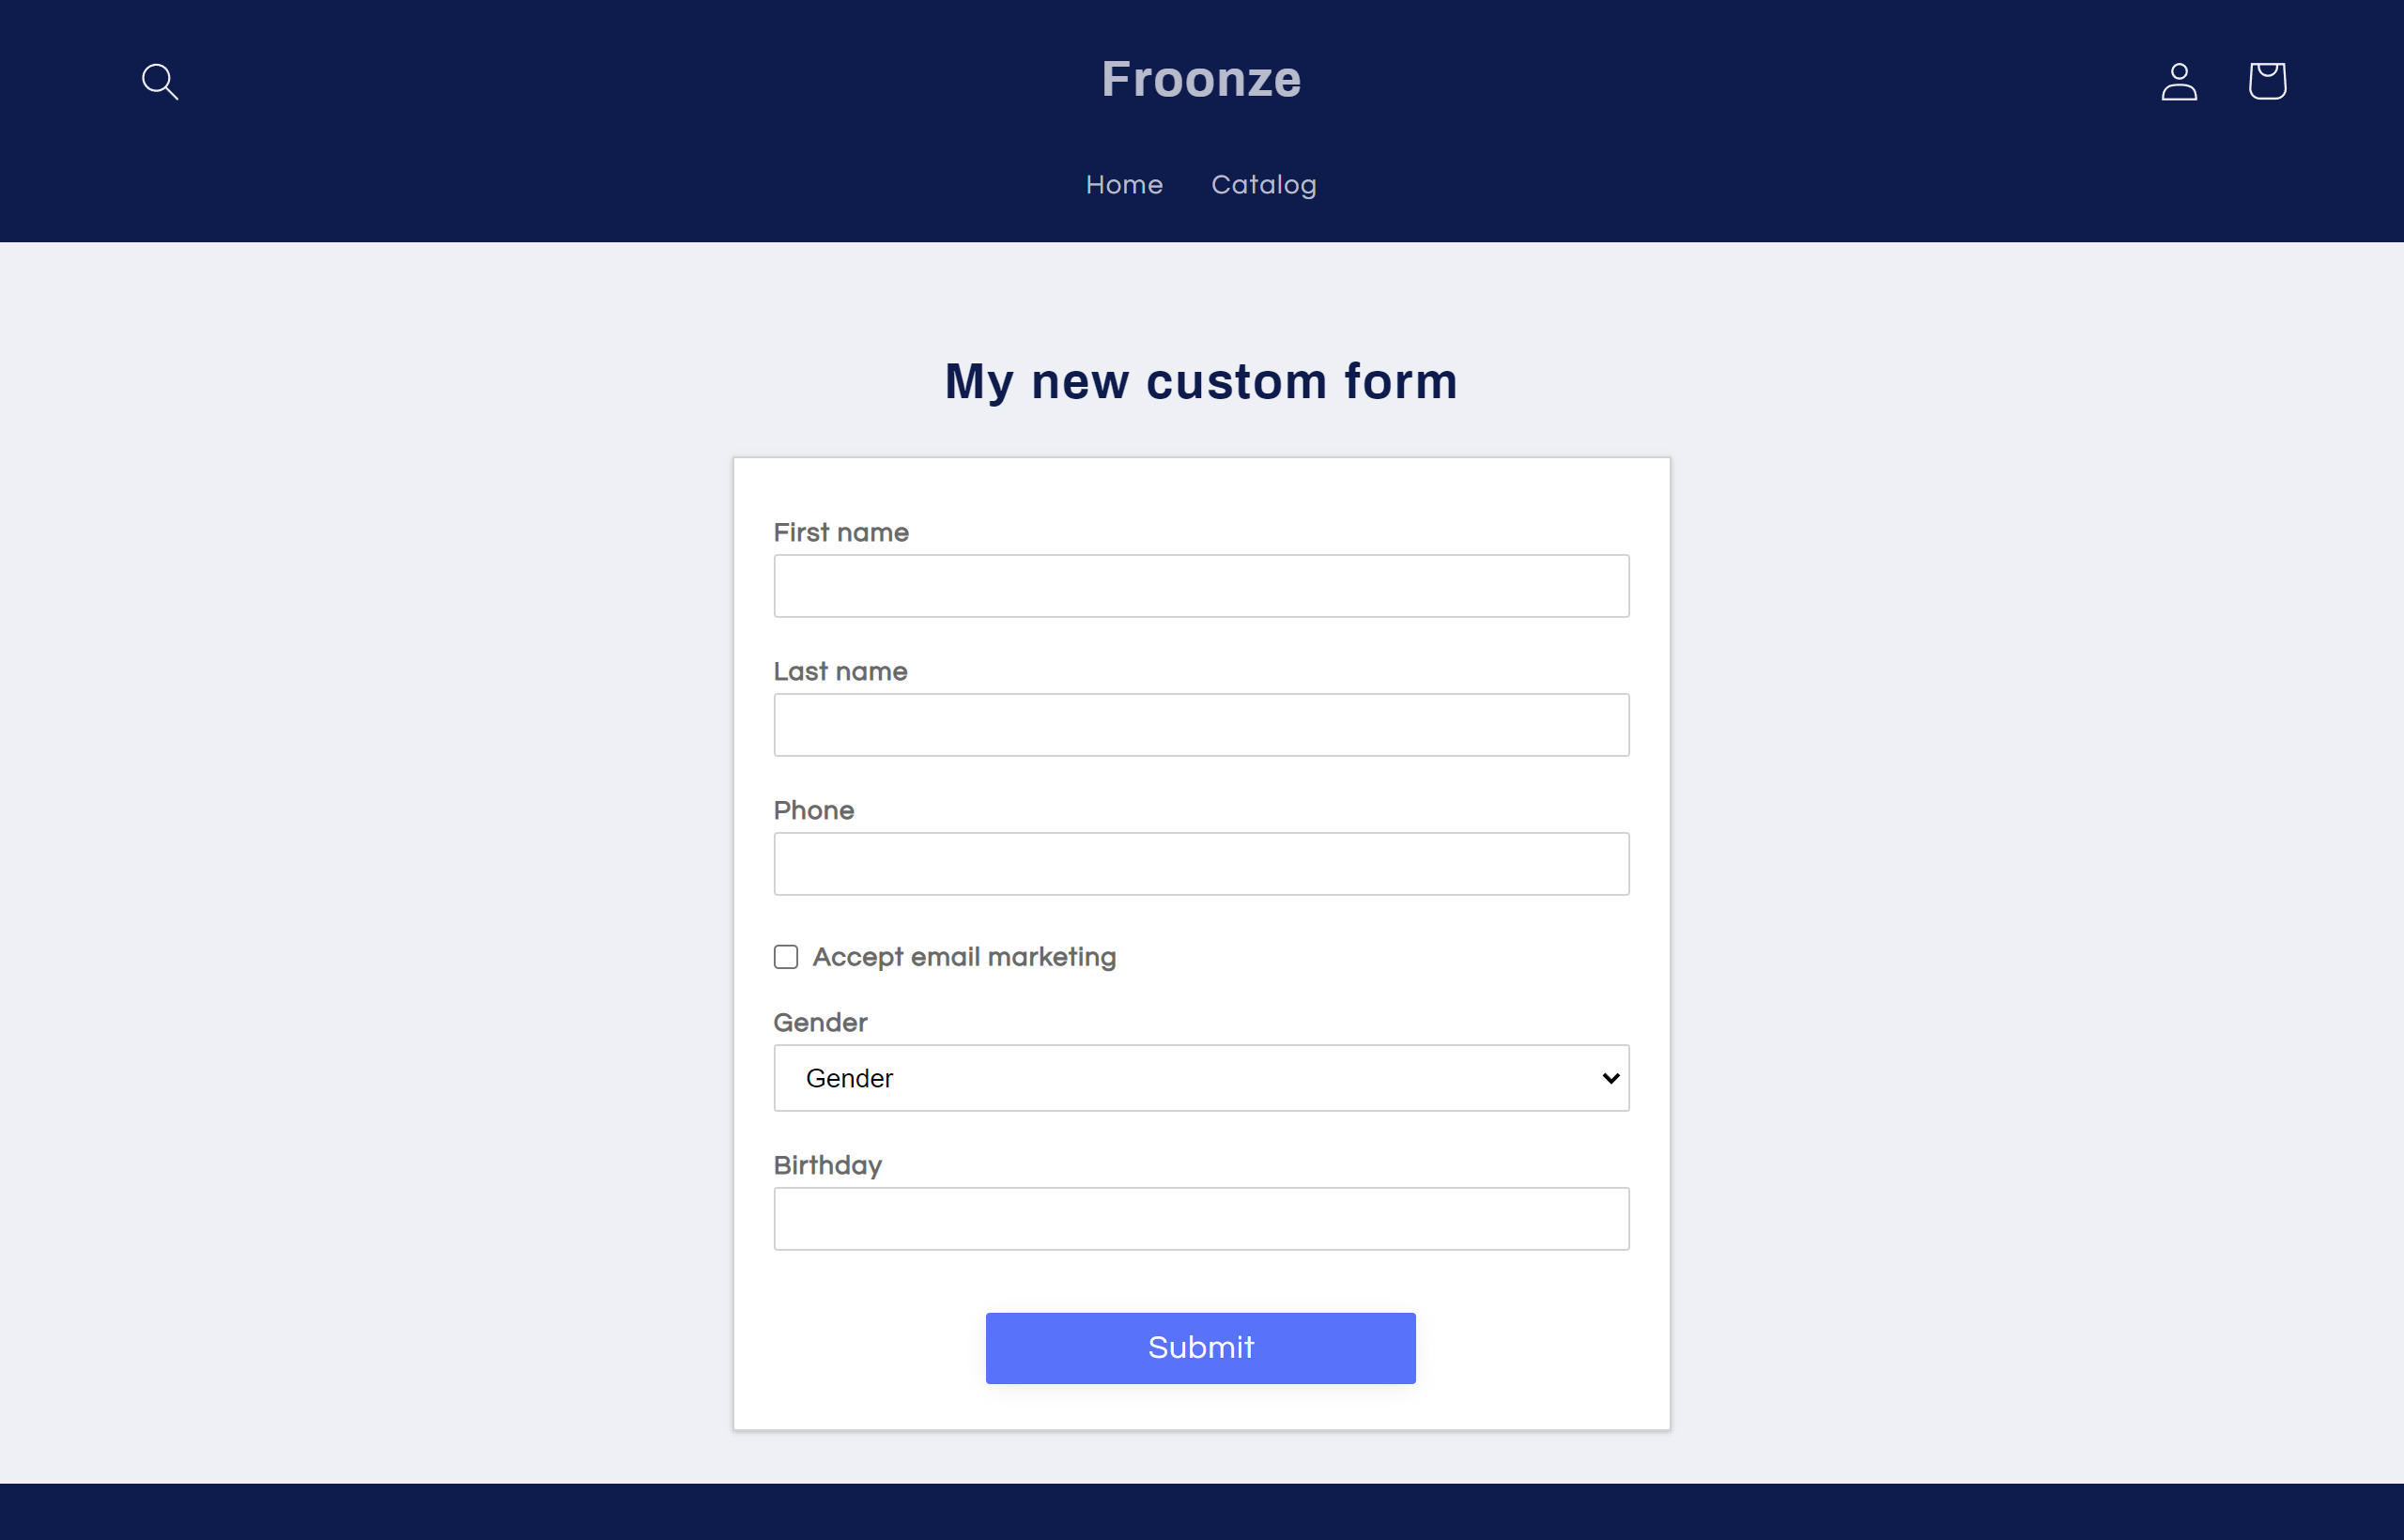
Your new page with the custom form is ready to be visited by your customers. You can also add it as tab in our account widget with our Custom Pages plugin.